• Blog
  • Recipes
  • Lifestyle
  • Safer Skincare
  • About
  • Contact
Menu

Kate's Healthy Cupboard

Street Address
City, State, Zip
Phone Number
Healthy Lifestyle, Healthy Grain Free Recipes

Your Custom Text Here

Kate's Healthy Cupboard

  • Blog
  • Recipes
  • Lifestyle
  • Safer Skincare
  • About
  • Contact

Bacon Pecan Maple Mustard Chicken

September 30, 2015 Kate
Bacon Pecan Maple Mustard Chicken

I recently received a sampler pack of goodies from Steve's Paleo Goods.  The box was full of grain free granola, cookies, jerky's sauces, dried fruits and more!! The cool thing about this online paleo store, is that 15% of the proceeds go to Steve's Club National Program.  This is his 501c3 non-profit that brings fitness, nutrition guidance and mentorship to at-risk youth.  He works with CrossFit Affiliates across the country to start Steve’s Club Local Clubs in their own communities. This has always been his passion; and it continues to be the driving force behind Steve's PaleoGoods.  You can find these goodies along with nut butters, spice rubs, oils, cracklings and so much more at Whole Foods or online!!

 One smell of the two sauces I erceived and I knew I needed to create a savory recipe for you guys!  I was lucky enough to receive his Maple Mustard and Ginger Cilantro sauces.  These can be used for dressings, marinades, sauces and dips.  The best part is that they are made with olive oil and apple cider vinegar, unlike most sauces and dressings that are full of gmo canola oil!  I hope you enjoy this recipe as much as we did!!  It makes for great leftovers...even cold right out of the fridge!

Bacon Pecan Maple Mustard Chicken

Prep time: 10 mins
Cook time: 30 mins
Total time: 40 mins
Serves: 4

Ingredients

  • 4 chicken breasts, thinned out
  • 1/4 - 1/3 cup Maple Mustard*
  • 4-5 strips of bacon, cooked and cut into pieces
  • 1/4 cup pecans, chopped into pieces
  • Stone ground mustard

Instructions

  1. Place the chicken breasts in a greased baking dish
  2. Brush or spoon on about 1 tbsp of Maple Mustard onto the top of each breast to lightly coat. Reserve the rest of the sauce for later
  3. Sprinkle the bacon and pecan pieces over each breast
  4. Bake with a loose cover at 350 for 15 minutes. Remove the cover and bake an additional 15 minutes.
  5. Remove from the oven and drizzle the remaining Maple Mustard over each breast. Finish them off with another drizzle of stone ground mustard

Notes
*Maple Mustard sauce is from Steve's Paleo that can be found online (link in blog) or from Whole Foods.

xo,

In Recipes, Entrees2 Tags Bacon, Chicken, Dairy Free, Low Carb, Paleo
Comment

Favorite KHC Low Carb Recipes

December 30, 2014 Kate
low carb collage
low carb collage

As the New Year is upon us, most are looking to clean up the damage from the Holidays!  One way to do this is to cut down on the amount of carbohydrates you are eating!  A lot of my recipes are low carb, especially when you use Swerve in the sweet treats.  I decided to share a few of my favorite with you all in one place!  Hope this helps you get your year started in the right direction!

Sausage Fauxtato Frittata

Breakfast Meatza Pizza

Bacon Meatloaf

Olive Garlic Meatballs

Chicken with Mushroom Cream Sauce

Italian Stuffed Spaghetti Squash

Bacon Chili

Italian Chicken Nut Rolls

Sauteed Radishes

Bacon Brussels Sprouts

Coconut Cauliflower Rice

Creamy Cauliflower Mushroom Soup

Spinach Avocado Dip

Cheddar Cheese Crackers

Olive Garlic Crackers

Cracked Pepper Cashew Crackers

Dairy Free "Cheez-its"

Sunflower Seed Herb Crackers

Flourless Snickerdoodles

Lemon Gelato

Peanut Butter Fudge

Faux Baked Cinnamon Apples

Brownie Fudge

Flourless Lemon Cookies

Dairy Free Peanut Butter Ice Cream Pie

Flourless Chocolate Chip Cookies

Coconut Cashew Cookies

Chocolate Drop Cookies

Wishing You Health and Happiness in 2015!

If you are an Amazon shopper, would you be so kind to use my affiliate link to make your purchases.  It is at no cost to you, it does provide a tiny kickback to Kate’s Healthy Cupboard.  This allows me to continue making and testing recipes for free.  Thanks so much!!

*I have recently switched all of my skincare and makeup to a company that is free of 1,500 chemicals!!  I am so particular about what goes into my body, I need to be just as picky as to what goes on my body!  Your skin is your largest organ and absorbs chemicals into the bloodstream faster than the gut does!  I am vain when it comes to my skin and was so thrilled to find products that are anti-aging and work!!!  Check out BeautyCounter for more info!!  You will love it!!

Kate's Healthy Cupboard - Gluten Free Recipes
In Uncategorized Tags Low Carb, Paleo
Comment

Coconut Curry Cauliflower (Red Ape Cinnamon Giveaway)

March 27, 2014 Kate
Coconut Curry Cauliflower Recipe

I'm taking roasted cauliflower to a whole different level!  Instead of using an oil or butter to roast the cauliflower, I decided to use full fat coconut milk for the fat and for flavor.  I also used Organic Buddha Shake Curry Mix from Red Ape Cinnamon company for the curry powder.  To read more about Red Ape Cinnamon and enter to win a bunch of their awesome cinnamon and spices, including the curry mix I used, head over to my previous post.  While you're there, check out the delicious Flourless Snickerdoodle Cookie Recipe if you haven't yet!!

Coconut Curry Cauliflower
Ingredients
  • 1 head of cauliflower, cut into pieces
  • 1/2 cup full fat coconut milk*
  • 1 1/2 tsp or more Red Ape Cinnamon Organic Buddha Shake Curry Mix (or any curry blend)
  • sea salt to taste
Instructions
  1. Whisk together the coconut milk and curry powder in a bowl
  2. Place 1/3 of the cauliflower pieces in the milk mixture and coat.
  3. Place the cauliflower onto a parchment lined cookie sheet and repeat the process with the remaining cauliflower. Pour the remaining milk over top and sprinkle with sea salt
  4. Bake at 425 for about 25 minutes or until the cauliflower starts to brown
  5. Serve hot
Quick notes

*Use a milk that tends to be thicker so it doesn't completely run off the cauliflower. I prefer Whole Foods brand or Thai Kitchen in the red and black can.

If you are an Amazon shopper, would you be so kind to use my affiliate link to make your purchases.  It is at no cost to you, it does provide a tiny kickback to Kate’s Healthy Cupboard.  This allows me to continue making and testing recipes for free.  Thanks so much!!

Kate's Healthy Cupboard - Gluten Free Recipes
In Vegetables, Recipes Tags Coconut Milk, Egg-Free, Nut-Free, Paleo, Vegan, Vegetables
Comment

Flourless Nut Free Snickerdoodle Cookies

March 24, 2014 Kate
Flourless Nut Free Snickerdoodle Cookies Recipe

So excited to share this nut-free, dairy free and starch free cookie recipe and to introduce you to Red Ape Cinnamon!  I randomly came across this company and was so thrilled I did!  They have an organic cinnamon that is sustainably harvested that is slowly ground to sweet, fragrant perfection. If it's good enough for some of the most discerning chefs, it must be good enough for us!  For any of you that have been to Portland, you know of the famous Salt & Straw and Scoop Shop Ice Cream shops.  They use Red Ape Cinnamon in their Snickerdoodle ice cream....yum!!!  Why Red Ape...5% of the profits from their cinnamon products go to protecting orangutans and their habitat.  A portion of the funds also go towards adopting orangutans.  So not only are their products fantastic, but they are also doing great things for the environment!

Cinnamon has many health benefits including decreasing blood sugar levels, but not all cinnamon is created equal!  I actually just heard something this morning that cheaper cinnamon like the brand you buy in huge containers at Costco, usually aren't made completely of cinnamon!  Yes it may taste good from the cinnamon flavor they add, but you certainly aren't getting the health benefits!  Besides the amazing taste of Red Ape Cinnamon, another bonus is that you don't need very much to add incredible flavor.

You can read more about Red Ape Cinnamon and how it came to be on their website.  It is not just cinnamon, they have a variety of awesome and unique spice blends that all include cinnamon.  I used their Premium Ground Cinnamon and their Cinnamon Sugar Shake in this cookie recipe.  Stay tuned later this week for a savory recipe using another one of their spice blends!  And......one of you lucky readers is going to win a jar of each of their products!!!  Comment on this post or on Kate's Healthy Cupboard Facebook where the recipe has been posted and let us know what product you can't wait to try from Red Ape Cinnamon!!!  Please go like Red Ape Cinnamon on Facebook, follow them on Pinterest and check out their website for more cinnamon recipes.  I will randomly select a winner on Monday, March 31st!  You will have two chances to win, comment on this post and on the upcoming savory post later this week!!

If you have been grain free for a while, you know it's hard to replicate glutinous dessert recipes exactly.  Almond flour does a pretty good job and so does adding some starch, but I am really trying to create some nut free, low carb options for people.  This Snickerdoodle Recipe will definitely cure your sweet tooth, they almost melt in your mouth from the coconut butter...Enjoy!

Recipe: Flourless Nut Free Snickerdoodle CookiesIngredients

Makes about 12

  • 1 cup coconut creme/butter*, softened
  • 1 egg
  • 1/2 cup granulated sweetener (I used Swerve for no sugar option)
  • 2 tsp vanilla
  • 1/4 tsp baking soda
  • 1/4 tsp baking powder (gluten and corn free)
  • 1/4 tsp sea salt
Cinnamon Coating**:
  • 1 tbsp Red Ape Cinnamon Sugar Shake
  • 1 tsp Red Ape Premium Cinnamon
  • 2 tbsp granulated sweetener (I used combo of Swerve and Coconut Palm Sugar. You could use all Cinnamon and Sugar Shake, but I wanted to cut down on the sugar)
Quick Notes:
*I order coconut creme from Tropical Traditions or you can usually find the Artisana Brand at Whole Foods or other natural grocery stores. The top layer is coconut oil, so you may need to scrape that off to get to the creme, but save the oil for another use. I soften it by placing the jar in a small saucepan of simmering water.
**You can use any combo of cinnamon and sugar in a 1:1 ratio but use a bit more sugar than cinnamon)
Instructions
  1. In a mixing bowl or food processor, combine the coconut butter/creme, egg (whisked if using a bowl) and vanilla
  2. Add the 1/2 cup sugar, soda, powder and salt, mix well.  Make sure no clumps remain in dough
  3. In a small bowl, combine the cinnamon and sugar mixture for the coating
  4. Roll the dough into one inch or larger dough balls. If batter is too runny from the coconut creme, place it in the frig for a few minutes to harden
  5. Roll each ball in the cinnamon sugar mix and coat well. I sort of mashed it into each ball and then rerolled each ball
  6. Place the balls on a parchment lined cookie sheet and press down with the palm of your hand. Cookies should not spread much unless batter is really soft
  7. Take the leftover cinnamon sugar mixture and sprinkle it over top the cookies
  8. Bake at 350 for about 12 minutes
  9. Remove from heat and let the cookies sit on the cookie sheet until they are set up. They will fall apart if you try to remove them when hot
  10. Place on a cooling rack to finish setting up

If you want to try Swerve or need to order more, use coupon code KATE10 for a 10% discount.  Swerve is my favorite sugar replacement.  It is the only sugar alcohol that will not cause tummy troubles and it does not raise blood glucose levels.

If you are an Amazon shopper, would you be so kind to use my affiliate link to make your purchases.  It is at no cost to you, it does provide a tiny kickback to Kate’s Healthy Cupboard.  This allows me to continue making and testing recipes for free.  Thanks so much!!

*I have recently switched all of my skincare and makeup to a company that is free of 1,500 chemicals!!  I am so particular about what goes into my body, I need to be just as picky as to what goes on my body!  Your skin is your largest organ and absorbs chemicals into the bloodstream faster than the gut does!  I am vain when it comes to my skin and was so thrilled to find products that are anti-aging and work!!!  Check out BeautyCounter for more info!!  You will love it!!

Kate's Healthy Cupboard - Gluten Free Recipes
In Recipes, Desserts3 Tags Coconut Creme, Cookies, Dairy Free, Flourless, Nut-Free, Paleo
9 Comments

Flourless Peanut Butter Cookies

March 1, 2014 Kate
Flourless Peanut Butter Cookies Recipe

I randomly made this cookie recipe for my boyfriend when I was recently in Arizona...and I ended up eating just about all of them!!!  I rarely eat peanut butter, prefer almond butter, but dang these were good!!!  I even made another test batch when I came home and added dark chocolate chips, YUM!!!!!!  There's just something about peanut butter and chocolate that no other nut or seed butter can compare to!  The peanut butter can easily be substituted for any nut or seed butter and I highly suggest adding some chocolate chips!!

I have quite a few Flourless Cookie Recipes including this Chocolate Almond Butter Cookie Recipe that is similar to this recipe.

Flourless Peanut Butter Cookies

Makes about 15

Ingredients
  • 1 cup natural peanut butter (I used fresh grind, no added oils)
  • 1/2 cup granulated sweetener, palm sugar or maple sugar (Swerve for no sugar option)*
  • 1 pastured egg
  • 1 tsp vanilla extract
  • 1/2 tsp sea salt (use less if using jarred nut butter that is salted)
  • 1/3-1/2 cup dark chocolate chips (optional)
Instructions
  1. Whisk the egg and vanilla in a mixing bowl
  2. Add the nut butter, sweetener and salt and combine
  3. Fold in chocolate chips (optional)
  4. Roll dough into 1 inch balls and place on a parchment lined cookie sheet
  5. Using a fork, press the dough in both directions to make the criss cross marks
  6. Bake at 350 for 10-12 minutes
  7. Store in an airtight container...if there are even any left!!
Quick notes

*I used about 1/2 cup Swerve and a tbsp of palm sugar.

If you want to try Swerve or need to order more, use coupon code KATE10 for a 10% discount.  Swerve is my favorite sugar replacement.  It is the only sugar alcohol that will not cause tummy troubles and it does not raise blood glucose levels.

If you are an Amazon shopper, would you be so kind to use my affiliate link to make your purchases.  It is at no cost to you, it does provide a tiny kickback to Kate’s Healthy Cupboard.  This allows me to continue making and testing recipes for free.  Thanks so much!!

*I have recently switched all of my skincare and makeup to a company that is free of 1,500 chemicals!!  I am so particular about what goes into my body, I need to be just as picky as to what goes on my body!  Your skin is your largest organ and absorbs chemicals into the bloodstream faster than the gut does!  I am vain when it comes to my skin and was so thrilled to find products that are anti-aging and work!!!  Check out BeautyCounter for more info!!  You will love it!!

Kate's Healthy Cupboard - Gluten Free Recipes
In Recipes, Desserts3 Tags Cookies, Flourless, Paleo, Peanut Butter, Swerve
3 Comments

Cracked Pepper Cashew Crackers

February 25, 2014 Kate
Grain Free Crackered Pepper Cashew Crackers Recipe

The Whole Foods I shop at used to have Cracked Pepper and Sea Salt Cashews in the bulk section...and I loved them!!  Unfortunately you know they were roasted in crappy vegetable oil and would be very easy to make yourself!  They no longer carry them, I could make them or I could get a bit more creative and make a cracker recipe out of cashews in the same flavor. Let this recipe be a template for you to make any cracker flavor you'd like with any nut you'd like!  I loved the spiciness of the pepper and couldn't get enough of these!!!  This could easily be turned into a sweet cracker with a touch of sweetener and cinnamon in place of the salt and pepper.  Looking for other grain free cracker ideas, I have a bunch of different recipes for you!

Cracked Pepper Cashew Crackers
Ingredients
  • 2 generous cups raw cashews
  • 1 pastured egg
  • 1 tbsp coconut oil, butter or ghee*
  • 1 tsp sea salt
  • 1 tsp cracked black pepper
Instructions
  1. In a food processor, grind the cashews into a flour. Make sure not to over blend into cashew butter, but you want it as fine as possible
  2. Add in the salt and pepper and pulse to combine
  3. In a mixing bowl, whisk the egg and oil together and stir in the flour mixture until combined
  4. Place the ball of dough in the center of a large piece of parchment paper with an additional piece of paper over top
  5. Roll out to desired thickness, about 1/8 - 1/4 inch
  6. Using a sharp knife or pizza cutter, cut into desired size.  You may want to sprinkle more salt and pepper over the top of dough
  7. Bake at 350 for 12-15 minutes or until a bit brown
  8. Store in an airtight container
Quick notes

*I used expeller pressed coconut oil. Macadamia nut oil would be great here too!

If you are an Amazon shopper, would you be so kind to use my affiliate link to make your purchases.  It is at no cost to you, it does provide a tiny kickback to Kate’s Healthy Cupboard.  This allows me to continue making and testing recipes for free.  Thanks so much!!

*I have recently switched all of my skincare and makeup to a company that is free of 1,500 chemicals!!  I am so particular about what goes into my body, I need to be just as picky as to what goes on my body!  Your skin is your largest organ and absorbs chemicals into the bloodstream faster than the gut does!  I am vain when it comes to my skin and was so thrilled to find products that are anti-aging and work!!!  Check out BeautyCounter for more info!!  You will love it!!

Kate's Healthy Cupboard - Gluten Free Recipes
In Recipes, Snacks and Appetizers3 Tags Cashews, Crackers, Dairy Free, Paleo, Vegan
Comment

Sauteed Radishes

February 8, 2014 Kate
Sauteed Radishes Recipe

How about a savory Valentine's Recipe!!!  Don"t worry, more chocolate and sweets to come!!! It's so funny how much more attention my treat recipes get than recipes like these radishes!

I bought the Easter Egg Radishes that are bright pink, red and white for this dish, but the color diminishes a ton when you cook them.  These are so pretty and could be served cold drizzled with a dressing for your Valentine's Day dinner as an alternative.

radishes
radishes

I had never tried cooking radishes until today...yum!!  You don't even have to be a radish fan to like this recipe.  So much of the "spiciness" is removed and they almost taste like little potatoes, maybe that's because of the butter.  I think radishes would add a lot of flavor to roasted vegetables, so next time you roast a chicken with veggies, add some radishes.  This is an easy recipe and can be seasoned to your liking!  And, as an added bonus, radishes contain nutrients that detoxify and nourish the body!!!

Sauteed Radishes
Ingredients
  • 2 bunches of radishes
  • 2-3 tbsp grass-fed butter, ghee or coconut oil
  • 1-2 tsp sage (I used dried)
  • sea salt and pepper to taste
Instructions
  1. Wash and remove the leaves and stems from the radishes. Cut in half or quarters depending on the size of the radishes
  2. Melt the butter over medium high heat in a skillet and toss in the radishes
  3. Let cook for about 6-7 minutes or until soft and browned, stir occasionally
  4. Sprinkle the sage, salt and pepper
Variations

Diced onions and/or garlic would also be good in this recipe.

If you are an Amazon shopper, would you be so kind to use my affiliate link to make your purchases.  It is at no cost to you, it does provide a tiny kickback to Kate’s Healthy Cupboard.  This allows me to continue making and testing recipes for free.  Thanks so much!!

*I have recently switched all of my skincare and makeup to a company that is free of 1,500 chemicals!!  I am so particular about what goes into my body, I need to be just as picky as to what goes on my body!  Your skin is your largest organ and absorbs chemicals into the bloodstream faster than the gut does!  I am vain when it comes to my skin and was so thrilled to find products that are anti-aging and work!!!  Check out BeautyCounter  for more info!!  You will love it!!

Kate's Healthy Cupboard - Gluten Free Recipes
In Vegetables, Recipes Tags Dairy Free, Egg-Free, Nut-Free, Paleo, Vegan, Vegetables
2 Comments

Chocolate Dipped Valentine's Marshmallows

February 3, 2014 Kate
Sugar Free Chocolate Dipped Valentine's Marshmallows

So excited to bring you this fun Valentine's Day Marshmallow Recipe.  I can't really take credit for it...only the pink part and chocolate dipping is my creation.  The best part is that these are naturally colored with beet juice.  The credit goes to Adrienne over at Whole New Mom.  Her website it full of great recipes, DIY remedies, lotions and potions.  Go check her blog out!!! This recipe calls for liquid sweetener and I have not been able to find anything that works in recipes to replace honey, syrup or corn syrup with no sugar.  Adrienne has the answer...vegetable glycerin!!  We have all heard that you shouldn't put anything on your skin that you wouldn't put in your mouth.  Well vegetable glycerin is often times found in skin care as a natural preservative, but also has a bit of sweetness to it and is completely food grade.  What the heck is vegetable glycerin?

According to Wise Geek: Vegetable glycerin can also be made directly from vegetable oil — often coconut or palm oil — by heating it to a high temperature under pressure with water. The glycerin backbone splits off from the fatty acids, and is absorbed by the water, from which it is then isolated and distilled to obtain the pure product. Food-grade vegetable glycerin is 99.7% pure, with the remaining 0.3% being water. Select this line to insert text description of recipe here

Glycerin is widely used in the food industry for two main reasons: it has a sweet taste, but has fewer calories than sugar; and it is hygroscopic, that is, it absorbs moisture from the air. It is therefore used both to sweeten foods and to keep them moist. The compound is metabolized more slowly than sucrose— the type of sugar most commonly found in candy and in processed foods — and therefore does not have such a dramatic effect on blood sugar levels. It also does not contribute to bacterial tooth decay. Foods marketed as being low in carbohydrates are often sweetened with glycerin.

Another major use is in the cosmetics industry. Due to its hygroscopic properties, it is used in many moisturizing skin products, as it seems to help relieve dry skin problems by drawing water up from the lower layers. It is also a component of glycerin soap, which is often used by people with sensitive skin. Lotions containing this compound are also popular.

I did some research to find a source of vegetable glycerine that was from coconut and/or palm oils, not soy oil.  I think the best source is from Wilderness Family Naturals.  They are a trusted company with great products (I have no affiliation)!!!  You can also use Now Foods Vegetable Glycerin that I believe to be a reputable source as well.  The Now Brand can be found in many local health food stores and possibly Whole Foods.  It is sold in the lotion section since many people add it to their homemade lotions.

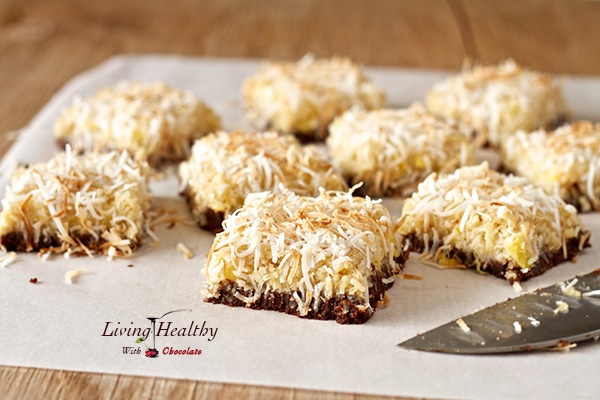
Recipe: Chocolate Dipped Valentine’s Marshmallows

Original Marshmallow Recipe from Whole New Mom

Ingredients

  • 2 tbsp gelatin from grass-fed cows (I use Great Lakes Gelatin)
  • 1/2 cup cold water that has been beet juice infused (directions below)
  • 1 – 1 1/2 cups granulated sweetener (I used a cup total of Swerve and Xylitol
    mixed for sugar free option)
  • 1/2 cup hot water
  • 1/2 cup liquid sweetener (I used vegetable glycerin for sugar free option, see above for info and where to buy)
  • 2 tsp vanilla extract
  • 1/2 cup dark chocolate chips* (Use Enjoy Life Chocolate Chips for dairy free option)

Instructions

  1. Peel and cut a very small raw beet into about 1 inch chunks. Place the beets in a saucepan along with 1/2 cup of water
  2. Warm the water on low heat to get the beets to bleed. You want really pink/red water. Once you blend this with the gelatin and other ingredients, it really lightens up.
  3. Place the water in the refrigerator to cool for a few minutes.  Remove and discard the beets
  4. In a large mixing bowl or standup mixer, pour the cooled pink water and sprinkle the gelatin over top, let sit
  5. Combine the granulated sweetener, liquid sweetener and additional 1/2 cup hot water in a heavy bottom saucepan
  6. Cook over medium high heat until mixture reaches 240-245 (soft ball stage)
  7. With a hand mixer or standup mixer, start beating the gelatin and beet water as you slowly add in the hot sweeteners.
  8. Slowly add in the vanilla and continue to beat until stiff peaks have formed, thick marshmallow creme
  9. Pour the creme into an 8×8 greased pan (or larger if you want thinner marshmallows)
  10. Let sit and harden. Cut into desired shape and size
  11. Melt the chocolate in a double broiler. Using a toothpick or skewer, dip the marshmallows in the chocolate and let cool
  12. Store in an airtight container. I prefer glass jars

Quick notes

*Use more chocolate if you want to completely coat the marshmallows

Variations

As Adrienne suggests, you can roll marshmallows in coconut, cocoa, nuts or any other topping.


If you want to try Swerve or need to order more, use coupon code KATE10 for a 10% discount.  Swerve is my favorite sugar replacement.  It is the only sugar alcohol that will not cause tummy troubles and it does not raise blood glucose levels.

If you are an Amazon shopper, would you be so kind to use my affiliate link to make your purchases.  It is at no cost to you, it does provide a tiny kickback to Kate’s Healthy Cupboard.  This allows me to continue making and testing recipes for free.  Thanks so much!!


Kate's Healthy Cupboard - Gluten Free Recipes
In Recipes, Desserts3 Tags Chocolate, Dairy Free, Gelatin, Holiday, Nut-Free, Paleo, Swerve, Vegetable Glycerin
5 Comments

Buckeye Bark

January 30, 2014 Kate
Buckeye Bark
Buckeye Bark

Valentine's Day is just around the corner, so twist my arm, I guess I'll make a bunch of chocolate recipes!!!  I have a bunch of fun stuff planned so let's hope I can get it all done and that it all turns out!!!

Nut butter and chocolate is a match made in heaven no matter what form it comes in!!  Buckeye cookies are the peanut butter cookies with a Hershey's Kiss in the middle.  So Buckeye Bark is peanut butter and chocolate in a different form.  This recipe can be made with any nut or seed butter or even with coconut butter (cream).

This recipe was adapted from Chocolate Chocolate and More. 

Recipe: Buckeye Bark

Ingredients

  • 2 cups (about 12 oz) dark chocolate chips or pieces

  • 1 cup natural nut/seed butter (no added oils or sugars)

  • 1/2 cup Swerve or sweetener of choice*

  • 1 tbsp coconut oil

  • 1 tsp vanilla extract

  • 1/2 tsp sea salt (omit if nut butter has salt in it)

Instructions

  1. Place parchment paper in the bottom of an 8x8 dish so that it flaps over two sides of the dish. This will make it easy to remove the bark from the dish

  2. Melt 1 cup of chocolate in a double broiler and pour it into the prepared dish. Place the chocolate in the freezer until it sets

  3. While chocolate is setting, combine the nut butter, sweetener, oil, vanilla and salt in a bowl

  4. Remove chocolate from freezer and spread the nut butter layer evenly over the chocolate

  5. Melt the remaining cup of chocolate and pour it over the nut butter and return the dish to the freezer

  6. Once the top layer has hardened, remove the bark from the dish and cut the bark into pieces. Store in the refrigerator in an airtight container

Variations

*I think liquid sweetener such as honey will work, but start with 1/4 cup and expect the nut butter layer to be a bit runnier.

KATE-SIGNATURE small.png


*I have recently switched all of my skincare and makeup to a company that is free of 1,500 chemicals!!  I am so particular about what goes into my body, I need to be just as picky as to what goes on my body!  Your skin is your largest organ and absorbs chemicals into the bloodstream faster than the gut does!  I am vain when it comes to my skin and was so thrilled to find products that are anti-aging and work!!!  Check out Beautycounter for more info!!  You will love it!!

20160125_AffiliateBanners_728x90.jpg
In Recipes, Desserts4 Tags Chocolate, Holiday, Paleo, Peanut Butter, Swerve
10 Comments

Faux Baked Cinnamon Apples

January 27, 2014 Kate
Faux Baked Cinnamon Apples Recipe

Nothing against apples, but I'm trying to eat less carbs and certainly less sugar.  Yes, I know there are nutrients in apples and it's natural sugar...sugar is sugar is sugar and I can find those same nutrients in vegetables!!!  For me personally, I do better without fructose and fruit in my diet.  For that reason, I have been using jicama in place of apples and potatoes in many recipes.  In case you missed it, this Sausage and Fauxtato Frittata Recipe is awesome!!!  Grab yourself some jicama, cause I've got some more low carb recipes coming soon!!!

Jicama is very crunchy, full of water and stays hard even when cooked.  I have found that you have to boil the jicama for a while before you use it in recipes if you want it to soften up like it does in this baked apple recipe.  It's easy to do and can be done ahead of time, just store in an air tight container in the fridge until you are ready to use them.

Faux Baked Cinnamon Apples

Serves: 3-4

Ingredients

  • 3 cups jicama, cubed and boiled* (1 small jicama)
  • 2 tbsp grass-fed butter or coconut oil
  • 1-2 tsp cinnamon (I like them with 2 tsp)
  • sweetener of choice (I used 2 tbsp of Swerve)
  • dash of sea salt

Instructions

  1. Heat the oven to 350
  2. Place the jicama in a casserole dish
  3. Cut the butter into pieces and place over the jicama. Sprinkle with cinnamon, sweetener and salt
  4. Bake covered for 30-40 minutes or until soft, stir after 20 minutes. I removed the lid for the last 10 minutes to remove the moisture
  5. Serve hot with some Dairy Free Vanilla Ice Cream.

Quick notes

*To boil the cubed jicama, cover it with water and boil for 30-45 minutes (depends on size of cubes) until soft. This can be done ahead of time, store in an airtight container in the refrigerator.

Variations

You could combine some almond flour, pieces of butter or coconut oil and sweetener to make a topping. I’d add the topping once you have removed the lid to finish cooking.  You could turn on the broiler for a few seconds to brown the topping too!

If you are an Amazon shopper, would you be so kind to use my affiliate link to make your purchases.  It is at no cost to you, it does provide a tiny kickback to Kate’s Healthy Cupboard.  This allows me to continue making and testing recipes for free.  Thanks so much!!

I have switched all of my skincare and makeup to a company that is free of 1,500 chemicals!  The European Union bans about 1,400 chemicals and the US bans 11 in an unregulated industry!  I am so particular about what goes into my body, I need to be just as picky as to what goes on my body!  Your skin is your largest organ and absorbs chemicals into the bloodstream faster than the gut does!  I am vain when it comes to my skin and was so thrilled to find products that are safe, non toxic, but are still anti-aging and work!!!  The makeup is chic, on trend and high performing! Check out Beautycounter for more info!!  Their mission is to get safe products into the hands of everyone!  I feel compelled to help educate and share this mission!  

Kate's Healthy Cupboard - Gluten Free Recipes
In Recipes, Desserts4 Tags Desserts, Low Carb, Paleo
14 Comments

Bacon Brussel Sprouts

January 8, 2014 Kate
Bacon Brussel Sprouts

Happy New Year!  I hope everyone had a great holiday season and got a chance to enjoy a few of my treats.  I just finished off the last of the cookies I made for Christmas.  It's so nice to know almost all of my treats were free of sugar since I used Swerve (my favorite sugar alternative) in all my recipes.  If your resolutions include giving up or decreasing the sugar in your diet, I highly recommend trying Swerve!  They are running a special in January and always offer 10% off to my readers with coupon code KATE10.

Enough about the sweets, it's time for vegetables, dinners and breakfasts for a while...well until it's Valentine's recipe time!  We enjoyed this brussels sprout recipe for our Thanksgiving and Christmas dinner.  These were a huge hit by everyone, even the brussels sprout haters liked them...how can you not when bacon is included!   This recipe is not a lot of work and certainly isn't high maintenance!

Recipe: Bacon Brussels Sprouts

Ingredients

  • 3-4 slices bacon, sliced into 1/2 inch pieces
  • 1 lb brussels sprouts, halved or quartered depending on size
  • 1/4 cup onions, diced
  • 1/2 cup water
  • salt and pepper to taste

Instructions

  1. Place the sliced bacon in a skillet over medium heat and cook until tender but not full cooked
  2. Remove all but 2 tbsp of the bacon grease and toss in the onions, cook until onions are translucent and bacon is fully cooked
  3. Add the brussels sprouts, stir to coat with grease
  4. Stir in the water and sprinkle with some salt and pepper
  5. Turn temperature down to low and place a lid on the skillet
  6. Let cook for 30-60 minutes or until very tender. The longer they cook, the more the sprouts take on the bacon flavor
  7. Salt and pepper to taste

If you are an Amazon shopper, would you be so kind to use my affiliate link to make your purchases.  It is at no cost to you, it does provide a tiny kickback to Kate’s Healthy Cupboard.  This allows me to continue making and testing recipes for free.  Thanks so much!!

Kate's Healthy Cupboard - Gluten Free Recipes
In Side Dishes, Vegetables, Recipes Tags Bacon, Low Carb, Nut-Free, Paleo, Vegetables
3 Comments

Gingerbread Cookie Bites

December 21, 2013 Kate
Gingerbread Ball Cookies

Molasses style cookies are a favorite around here anytime of the year!  Gingerbread man cookies are festive, cute and have a lot of character, but they are also a lot of work!!  I decided to take that flavor and do a simple cookie ball with all the flavor and half of the work! This gingerbread recipe calls for a unique flour...chestnut flour.  What is chestnut flour??!  Chestnut flour is a gluten free alternative to regular flour made from ground chestnuts.  Chestnuts have been dried and made into sweet flavored flour in Italy for centuries. In Tuscany, chestnut flour is considered a staple food, and it is commonly called for in recipes such as:  chestnut flour bread, pie crust, crepes, and other baked goods.  Its sweet flavor makes it the perfect fit for recipes involving almonds, chocolate, honey and hazelnuts. I have found it to be awesome in fall recipes that incorporate pumpkin and spice.  Chestnuts do not contain the fat content regular nuts have, and are instead largely composed of carbohydrates.  Chestnut flour does have less carbohydrates than regular white flour but has many of the same baking properties as flour.  It creates a fluffier baked good, has a distinct taste that has a bit of spiciness to it and pairs really well with warm fall flavors, especially ginger! I love using almond flour and am not afraid of fat by any means.  I'm just enjoying how much fun this flour is to work with, and not to mention how good it is!

Is it actually a nut or a fruit?  According to Wikipedia, it’s a fruit.  If you have tree nut allergies, please look into this more, but my understanding is that it’s not a nut!!! Where can you buy chestnut flour?  Check with your local natural grocery stores, I do know some Natural Grocers are selling it.  You can also order it from Amazon or from nuts.com.  I realize it's a unique ingredient, but I promise you will enjoy it.  I have some other recipes including these crunchy Ginger Snaps or this Pumpkin Bread you could also try.  I also provided a substitution for the flour in the recipe "variations" section of this cookie recipe for those of you that don't want to order it.  Both versions of the cookies are great, I just think the chestnut flour adds a bit more flavor.

Gingerbread Cookie Bites

Ingredients

  • 1 1/2 cups finely ground almond flour (I prefer Honeyville)
  • 1/4 cup chestnut flour* (see substitution below)
  • 3-4 tbsp granulated sweetener such as coconut palm sugar (I usedSwerve for a no sugar option)
  • 3 tbsp grass-fed butter, softened(ghee or coconut oil should work)
  • 1 1/2 tbsp molasses
  • 1 tsp vanilla extract
  • 2 tsp ground ginger
  • 1/2 tsp cinnamon
  • 1/4 tsp cloves
  • 1/4 tsp sea salt

Instructions

  1. Place the almond flour, chestnut flour (or arrowroot), sweetener, butter and spices and salt in a food processor and combine
  2. Add in the molasses and vanilla and pulse until dough forms into a big ball
  3. Place the dough in the refrigerator forat least 30 minutes to keep the cookies from spreading as they cook
  4. Roll the dough into one inch balls and place on a parchment lined cookie sheet
  5. Bake at 350 for 12-15 minutes. Let cool for a few minutes on the cookie sheet before moving to a cooling rack.  Cookies will get crisp as they cool
  6. Store in an airtight container. Place in the refrigerator if you prefer a hard cookie

Variations

*You can sub the chestnut flour for arrowroot flour, but only use 2 tbsp of arrowroot, NOT 1/4 cup! These may spread a tiny bit more, but are still delicious!!!

Enjoy!

KATE-SIGNATURE small.png

*I have recently switched all of my skincare and makeup to a company that is free of 1,500 chemicals!!  I am so particular about what goes into my body, I need to be just as picky as to what goes on my body!  Your skin is your largest organ and absorbs chemicals into the bloodstream faster than the gut does!  I am vain when it comes to my skin and was so thrilled to find products that are anti-aging and work!!!  Check out Beautycounter for more info!!  You will love it!!

20160125_AffiliateBanners_728x90.jpg
In Recipes, Desserts3 Tags Almond flour, Chestnut Flour, Egg-Free, Holiday, Paleo, Swerve
2 Comments

Flourless Chocolate Almond Butter Cookies

December 16, 2013 Kate
Flourless Chocolate Almond Butter Cookies

Here is another super easy and super delicious cookie to add to your holiday baking list.  These disappeared very quickly around here!  This recipe can be made with any nut or seed butter of choice.  Peanut butter seems to always taste the best with chocolate, but unfortunately I don't eat peanuts, so almond butter it is...and I loved them!

Flourless Chocolate Almond Butter Cookies

Makes 12-14

Ingredients

  • 1 cup almond butter*
  • 1/2 cup cocoa/cacao powder
  • 3/4 -1 cup granulated sweetener (I used 1 cup of Swerve to make them sugar free)
  • 1 egg
  • 1 tbsp vanilla
  • 1 tsp baking powder (corn and gluten free baking powder)
  • 1/4 heaping tsp sea salt (omit if jar is already salted)

Instructions

  1. Place all ingredients in a food processor or stand up mixer and combine
  2. Use a cookie scoop or roll the dough into balls and place on a parchment lined cookie sheet
  3. Press down the dough with hand or use a fork to flatten the cookies (the baking powder keeps the cookies from spreading, but also makes them crispier than baking soda)
  4. Bake at 350 for 7-10 minutes. The cookies will look undercooked, but that’s the way you want them to look! They will set up perfectly once they have cooled.
  5. Remove from the oven and let sit for a few minutes before moving them to a cooling rack.
  6. Store in an airtight container, I prefer glass jars for storage.

Quick notes

*I used fresh grind almond butter that you grind yourself at natural grocery stores. It does not have any added oils, salt or sweeteners. If you are using jarred almond butter or other nut butters, I’d use closer to 3/4 cup. Jarred butters are thinner and may make these spread more.

If you are an Amazon shopper, would you be so kind to use my affiliate link to make your purchases.  It is at no cost to you, it does provide a tiny kickback to Kate’s Healthy Cupboard.  This allows me to continue making and testing recipes for free.  Thanks so much!!

*I have recently switched all of my skincare and makeup to a company that is free of 1,500 chemicals!!  I am so particular about what goes into my body, I need to be just as picky as to what goes on my body!  Your skin is your largest organ and absorbs chemicals into the bloodstream faster than the gut does!  I am vain when it comes to my skin and was so thrilled to find products that are anti-aging and work!!!  Check out BeautyCounter for more info!!  You will love it!!

Kate's Healthy Cupboard - Gluten Free Recipes
In Recipes, Desserts3 Tags Almond Butter, Chocolate, Cookies, Flourless, Low Carb, Paleo, Swerve
3 Comments

Cranberry Pecan Crackers

November 19, 2013 Kate
Cranberry Pecan Crackers Recipe

The Holidays are here...so are all of the pumpkin recipes!  I haven't been in a pumpkin mood, so I'm trying to create some different holiday flavors this season.  First up, these Cranberry Pecan Crackers made with homemade dried cranberries.  I really like how this recipe turned out, the tartness of the cranberries with the bit of sweetness from the pecans works well together.  The crackers are almost a bit flakey and would pair well with a goat cheese spread if you can tolerate dairy.  I wish I could...sounds delicious!!

If you like the combination of cranberries and pecans, I highly recommend these Cranberry Pecan Muffins.  The topping alone makes these delicious and perfect for Thanksgiving morning!

Recipe: Cranberry Pecan Crackers

Ingredients

Dried Cranberries:

  • 1 1/2 cups fresh cranberries
  • 1 tsp coconut oil, melted
  • dash of sweetener (optional)

Crackers:

  • 1 tbsp grass-fed butter, Ghee or coconut oil, melted
  • 1 -2 tsp granulated sweetener (I used Swerve for no sugar option)
  • Couple dashes of sea salt or more for salty crackers.  I sprinkled the top of rolled out dough will a tiny bit more salt

Instructions

Cranberries:

  1. Combine cranberries, coconut oil and sweetener in a bowl. Pour onto a parchment lined cookie sheet and bake at 250 for 2-2 1/2 hours.
  2. Remove from heat once the majority of berries look dried, set aside to cool.

Crackers:

  1. Place the pecans and cranberries in a food processor and combine until pecans look like coarse sand
  2. Add the egg, butter/oil, sweetener and salt to the mixture and pulse until combined and dough forms
  3. Place the dough between two pieces of parchment paper and roll out to about 1/8 of an inch thick
  4. Using a pizza cutter or sharp knife, cut crackers into desired size
  5. Bake at 350 for 10-12 minutes or until lightly browned. Thinner crackers will cook faster and you may need to remove outer edge crackers before you remove the inner crackers
  6. Let cool to crisp up and store in an airtight container. I love using glass jars for my snacks!

Quick notes

*I did not want to use store bought dried cranberries, they have added sunflower oil and white sugar. You can certainly substitute store bought, but you will probably only need 1/2 cup or less and leave out the sweetener all together.  These crackers will definitely turn out to be a sweeter version!!

Variations

*You can use a dehydrator to dry out the cranberries. I chose the oven method since many people do not have a dehydrator.

Looking for a great online source for nuts and sooo much more...check out www.nuts.com for a huge variety of baked goods and nuts and nut flours!  If you want to try Swerve in your holiday baking, use coupon code Kate10 for 10% off when you order online.

If you want to try Swerve or need to order more, use coupon code KATE10 for a discount.  If you are an Amazon shopper, would you be so kind to use my affiliate link to make your purchases.  It is at no cost to you, it does provide a tiny kickback to Kate’s Healthy Cupboard.  This allows me to continue making and testing recipes for free.  Thanks so much!!

*I have recently switched all of my skincare and makeup to a company that is free of 1,500 chemicals!!  I am so particular about what goes into my body, I need to be just as picky as to what goes on my body!  Your skin is your largest organ and absorbs chemicals into the bloodstream faster than the gut does!  I am vain when it comes to my skin and was so thrilled to find products that are anti-aging and work!!!  Check out BeautyCounter for more info!!  You will love it!!

Kate's Healthy Cupboard - Gluten Free Recipes
In Recipes, Snacks and Appetizers3 Tags Crackers, Dairy Free, Holiday, Paleo, Pecans
7 Comments

"Rice" and Bacon Stuffed Pumpkin

November 14, 2013 Kate
Rice Stuffed Pumpkin2

Here's a fantastic and fun recipe to add to your Thanksgiving menu.  I originally had this dish with rice in place of cauliflower a couple years ago and loved it!!!  I figured I could recreate this to be grain free by using cauliflower rice.  My inspiration came from this recipe, Pumpkin Stuffed With Everything Good.  It was made with bread crumbs, but along the way it has been changed to rice (I include how to do that variation below).  I made my own additions and changes as well.  I had to make some adjustments after trying to cook the cauliflower in the pumpkin. I decided it gets way too much moisture (which is perfect for cooking rice), so it needed to be cooked in a casserole dish.  Also, through trial and error, I decided that sauteing the onions and mushrooms in the bacon grease added some additional flavor.  You certainly can leave the entire pumpkin part out (unless you are using rice), but it makes for such a great fall presentation!Instructions

Recipe: “Rice” Stuffed Pumpkin

Ingredients

  • 1 medium sized pumpkin, about 3 pounds
  • 1 medium head of cauliflower, riced (run though a food processor)
  • 4 pieces of bacon, cut into 1/2 inch pieces
  • 1 1/2 cups mushrooms, chopped
  • 3/4 cup sliced green onion, greens and whites (about 4 onions)
  • 1/4 cup unsweetened vanilla non-dairy milk
  • 2 tbsp grass-fed butter, melted (optional, see variation below)
  • 2-3 garlic cloves, minced
  • 1 tbsp fresh thyme, chopped
  • 1/2 tsp sea salt
  • 1/8-1/4 tsp nutmeg
  • Pepper to taste

Instructions

  1. Place the riced cauliflower in a large mixing bowl and set aside
  2. Cook bacon in a skillet until crispy, remove from grease and add to the cauliflower. Pour out all but 2 tablespoons of grease.
  3. Place the onions and mushrooms in the skillet of grease and saute over medium heat until the onion is translucent and mushrooms are tender
  4. Add the onion and mushroom mixture, garlic, butter, milk, thyme, salt, pepper and nutmeg to the cauliflower and mix well
  5. Place the mixture in a casserole dish and cover
  6. Bake at 350 for an hour
  7. While the cauliflower is baking, cut off the top of the pumpkin and remove the seeds and guts
  8. Once the cauliflower is done, spoon it into the pumpkin and place it on a cookie sheet. Return it to the oven with the lid on for another 15-30 minutes (make sure the oven shelf is low enough so the stem isn’t touching the burner).
  9. Remove the top after 15 minutes and remove from oven if cauliflower is done or cook another 15 minutes with lid off until done.
  10. Serve hot in the pumpkin

Variations

Butter makes everything better! You could substitute it with ghee as a dairy free option or increase the milk to 1/3 cup from 1/4 cup.

The original recipe calls for bread crumbs or rice. To make this with rice, sub the cauliflower with 2 cups of uncooked rice, use 1/3 cup milk and cook the entire dish inside the pumpkin from the start for 60-90 minutes with lid on.  Remove lid the last 15-30 minutes and cook until rice is done (Directions in link above for original recipe).


Holiday baking season is here!!  My favorite place to order all of my nut flours, nuts, chocolate, dried fruit, etc is www.nuts.com.  They have every kind of nut flour out there that is finely ground and sure to make your grain free baked goods perfect! They are certified gluten free so there is absolutely no cross contamination!!


Baking wouldn't be the same without a sweetener, but I prefer to use a sweetener that won't raise insulin levels, is natural, won't upset your belly and won't leave you feeling guilty!  Swerve is my go to...and you can enjoy 10% off as one of my readers with coupon code KATE10!

Kate's Healthy Cupboard - Gluten Free Recipes
In Side Dishes, Vegetables, Recipes Tags Bacon, Low Carb, Nut-Free, Paleo
1 Comment

Pineapple Coconut Bars with Chocolate Macadamia Nut Crust (Guest Post)

October 24, 2013 Kate
Pineapple-coconut-bars-1

I am so excited to share this guest post by Adriana of Living Healthy With Chocolate!  She is so very talented and has taken one of my favorite foods...chocolate and incorporated it into each and every recipe she creates!  Adriana lives in Hawaii and I think this tropical dessert tells a story of the amazing fresh foods she has access to on the island.  Coconut, chocolate and macadamia nuts are some of my favorites and these bars look delicious!  These are grain free and only sweetened with fruit and just a tiny bit of honey.  Enjoy her story and recipe below and be sure to go check out her blog and follow her on Facebook  and Pinterest to see all of her creations!!!

Pineapple and coconut are two of the most abundant fruits here in Hawaii. As you may know, pineapples are cultivated on an agricultural scale here by Dole Plantation. The farms are right next to my house and as I drive to and from work I can smell the sweet scent in the air. It is lovely! The down side of these farms is that they are heavily sprayed with pesticides and it breaks my heart every time I see the giant machinery spraying the crops. There are some growers in the islands that grow pineapple organically, but the price is over $8 for a very small pineapple, which makes it a rare and special treat for me.

Coconut on the other hand is everywhere. Some fruit stands sell the meat for very cheap, about $3.00 for a full bag. The organic store near my house often sells whole coconuts for just $1.50 each! How lucky am I?! Coconut is my favorite everyday snack and there is plenty of it here :) My husband and I often go to the local green waste drop off area by my house to look for coconuts that the tree trimmers just throw away by the dozens.....sometimes we are able to fill multiple containers with fresh coconut water and then we freeze the fresh meat.

How about the combination of coconut, pineapple, chocolate and macadamia nuts? If you haven't tried the four together you are in for a real treat. In this recipe I tried to mix all of these delicious foods into one irresistible dessert.

This is a very easy to make recipe and the consistency is soft and moist. The chocolate crust is sweetened with a creamy date paste and loaded with macadamia nuts. The top layer is a simple mixture of fresh pineapple and coconut. Depending on how sweet your pineapple is, you can add some raw honey to the mixture. I felt that one tablespoon was sweet enough, but feel free to add more if you would like it to be sweeter. Enjoy!Select this line to insert text description of recipe here

Pineapple Coconut Bars with Chocolate Macadamia Nut Crust

Ingredients

Crust:

  • 1/2 cup almond flour
  • 4 tablespoons raw cacao powder
  • 1/3 cup macadamia nuts
  • 5 medjool dates (about 1/2 cup)
  • 1/2 teaspoon vanilla extract
  • 1 1/2 teaspoons coconut oil, melted

Filling:

  • 2 eggs
  • 1 cup fresh pineapple, chopped
  • 1 1/3 cup shredded coconut, unsweetened
  • 1 tablespoon fresh lime juice
  • 1 tablespoon vanilla extract
  • 1 tablespoon raw honey
  • 1/2 cup almond flour
  • pinch of salt

Instructions

Crust:

  1. 1. in a large bowl, mix the almond flour and cacao powder
  2. 2. chop the macadamia nuts in a food processor and add it to the bowl
  3. 3. remove pits from dates and process it in the food processor until creamy
  4. 4. add the creamed dates, vanilla extract and coconut oil to the dry mixture and using your hands, mix to combine ingredients
  5. 5. spread the mixture evenly on the bottom of an 8×8-inch pan lined with parchment paper

Filing:

  1. 1. in a large bowl beat the 2 eggs
  2. 2. mix in the pineapple, 1 cup of shredded coconut (reserve the remaining 1/3 cup for the top), lime juice, vanilla and honey
  3. 3. gently mix in the almond flour and salt
  4. 4. pour mixture over the crust and sprinkle with remaining shredded coconut
  5. 5. bake at 350°F for about 20 minutes or until the top starts to turn brown and the pineapple/coconut layer is firm
  6. 6. set pan on a wire rack and allow it to cool before cutting into squares. Store in the refrigerator.
Kate's Healthy Cupboard - Gluten Free Recipes
In Recipes, Desserts3 Tags Chocolate, coconut, Paleo
2 Comments

Dairy Free Lemon Mousse

July 30, 2013 Kate
Dairy Free Lemon Mousse Recipe

I'm going to keep this short and sweet...this is the perfect refreshing summer dessert!!  This recipe was adapted from Nourishing Traditions Cookbook to make it dairy free.

Dairy Free Lemon Mousse

Serves: 4

Ingredients

  • 6 eggs
  • 2 tbsp lemon zest (2 lemons)
  • 4 tbsp or more of fresh lemon juice (2 lemons)
  • 1/4 – 1/2 cup liquid or granulated sweetener (I used about 1/2 cupSwerve for sugar free option)
  • 1/2 cup coconut cream*
  • sea salt

Instructions

  1. Place the yolks, sweetener, zest and juice in a double boiler over a pot of boiling water. Whisk about 10 minutes until the mixture thickens
  2. Once it has thickened, place in the frig for about half an hour to cool or the freezer for 10 minutes
  3. Place the egg whites in a bowl with a dash of sea salt and set aside
  4. Place the cream in a bowl and beat it until it is whipped and stiff, set aside
  5. Beat the egg whites with the salt until stiff peaks are formed
  6. Once the yolk mixture has cooled a bit, add it slowly to the cream and combine
  7. Now fold in the egg whites into the yolk and cream mixture
  8. Once mixture is combined, spoon into serving dish and refrigerate to allow the mousse to set up.

Quick notes

*Coconut cream is the thick cream that settles at the top of a can of refrigerated full fat coconut milk

Variations

The lemon zest can be felt in the mouth, so if this texture bothers you, I’d suggest blending the yolk mixture with the cream in a blender. Then, pour mixture into a bowl to then fold in the egg whites. This recipe will work with limes or oranges as well. Amount of zest and juice may vary.


I love using Swerve for making my dessert sugar free.  If you have been wanting to try Swerve, use KATE10 to receive 10% off your order.  Make sure to order $30 worth of product to get free shipping!

Kate's Healthy Cupboard - Gluten Free Recipes
In Recipes, Desserts3 Tags Coconut Milk, Dairy Free, Nut-Free, Paleo, Swerve
3 Comments

Beet Crackers

July 18, 2013 Kate
Beet Crackers
Beet Crackers

Recently Coconut Mama posted a recipe for sweet potato crackers that caught my eye.  I once tried to make sweet potato crackers without any coconut or almond flour and it just didn't work.  I will definitely be trying her cracker recipe and think you should too!  Crackers are something I totally miss, that crunch!

What does that recipe have to do with anything?  It was the inspiration for these beet crackers.  I have beets in the refrigerator that I planned to try using in some baked goods, but decided to use them for a cracker recipe instead.  The difference here is that there is not much starch in beets, so I had to add some.  I chose to use arrowroot, the starch from a tuber vegetable and my favorite starch to cook with.  It can be found in the flour section of any natural grocery store.  Bob's Red Mill sells it and it's a reasonably priced flour/powder.

I kept these crackers super simple and just used salt to season them.  I also topped them with my amazing black sea salt that adds so much flavor.  I think the variations are endless and next time I may try a bit of balsamic vinegar and basil or cumin with the salt.  Goat cheese seems to be great to pair beets with, try some atop these crackers!!

Recipe: Beet Crackers

Ingredients

  • 1 cup raw beets, diced
  • 2 egg whites*
  • 3 tbsp coconut flour
  • 3 tbsp arrowroot powder
  • 1 tbsp coconut oil**
  • 1/2 tsp sea salt and any other spices you desire
  • Sea salt to sprinkle on top

Instructions

  1. In a food processor, process the beets until they are pureed or close to it
  2. Add in the remaining ingredients and pulse until combined
  3. Pour mixture into a pile onto a piece of parchment paper and place an additional piece of parchment over the top
  4. Roll out the “dough” until about 1/8 inch thick or more for thicker crackers
  5. Sprinkle the top with kosher salt or other salt of choice
  6. Bake at 350 for 40-50 minutes
  7. As crackers harden, use a knife or pizza cutter to score the crackers into the desired size
  8. Thinner pieces will be done faster, remove those and continue to cook the rest. You can turn off the oven and let the crackers sit in it until they become completely crunchy

Quick notes

*I always have extra egg whites since I use so many yolks making my ice cream every night (no joke!), but it may work to use the entire egg.  Yolks make things more tender so you may only need one full egg if you do use the yolk.

**Any oil or grass-fed butter will work here. I used expeller press coconut oil to avoid coconut flavor. Olive oil would be good along with macadamia nut or walnut oil.

I loved how these turned out!  My only complaint is that I didn't double the recipe!!!

Kate's Healthy Cupboard - Gluten Free Recipes
In Recipes, Snacks and Appetizers3 Tags Coconut Flour, Crackers, Nut-Free, Paleo
1 Comment

Lemon Blueberry Breakfast Bars

July 2, 2013 Kate
Lemon Blueberry Breakfast Cake Recipe

So typically decadent bars are not something I eat for breakfast, but it seems like the perfect name for this recipe.  This lemony piece of deliciousness is actually the perfect refreshing treat anytime!

I chose to drizzle it with a lemon glaze to add some extra flavor, but it's not necessary.  This would also be good with any berry or a mix of berries.  You could do blueberries and strawberries and make it a 4th of July treat for your BBQ this holiday weekend!!!

The recipe calls for granulated sweetener and a powdered sweetener for the icing. I used my favorite natural sugar alternative Swerve and it's on sale until July 7th!!!  I use Swerve in all of my baked goods and ice cream recipes, it's the perfect healthy substitute and with a buy 2 get 1 free sale, it's time to stock up!!  And, it's free shipping when you spend over $30 and it's unlimited packages (so for every 2 packs you buy, you get a bag free)!  For this recipe I'd order at least 2 bags of the granulated so you get the free bag and one of the confectioners (powdered) or you can simply run the granulated thru a spice grinder or blender to powder it.  That way you qualify for free shipping!

 Lemon Blueberry Breakfast Bars

Ingredients

  • 1/2 cup coconut flour
  • 1/4 cup almond flour
  • 3 pastured eggs (I order from Tropical Traditions)
  • 3/4 cup full fat coconut milk
  • 1/3-1/2 cup granulated sweetener (I used Swerve for sugar free option)
  • 1 1/2 tbsp fresh lemon juice
  • 1 tbsp lemon zest
  • 1/2 tsp baking soda
  • 1/4 tsp sea salt
  • 1/2 cup fresh organic blueberries* (or more if you prefer)

Icing:

  • 3/4 cup powdered sweetener (I used confectioner Swerve for no sugar option.  You will need to run granulated sugar through a spice grinder or blender to prevent grainy icing)
  • 4-5 tbsp fresh lemon juice
  • 1/8 cup non-dairy milk (I used So Delicious unsweetened vanilla coconut milk)

Instructions

  1. Combine the flour, sugar, salt and soda in a bowl and set aside
  2. Beat the eggs, coconut milk and lemon juice in a large bowl
  3. Combine the flour with the wet ingredients and the zest and mix until all of the clumps are out
  4. Fold in the blueberries
  5. Pour batter into a 8×8 greased dish
  6. Bake at 350 for about 30 minutes

For the icing:

  1. Place all of the ingredients in a blender and combine
  2. Drizzle over the bars once they have cooled.

Variations

*Any berry or combination of berries would work in here. I would cut any berry besides blueberries into smaller pieces.


For some reason, baked goods that use coconut flour tend to taste better cold.  I suggest storing this in the refrigerator until you serve it or if you happen to have any left over!!

Kate's Healthy Cupboard - Gluten Free Recipes
In Breads and Muffins, Recipes, Breakfasts2, Desserts3 Tags Almond flour, Breakfast, Brunch, Coconut Flour, Coconut Milk, Paleo, Swerve
9 Comments

Coconut "Rice"

June 4, 2013 Kate
Coconut Cauliflower Rice

Summer is here....hence why I have been absent in the kitchen lately.  I am trying to get outside more and get off of the computer.  Don't worry, I still have lots of recipes in the pipeline!

This recipe is inspired by a recipe from The Joy of Cooking, one of my favorite cookbooks.  The original recipe was made with jasmine rice, but I chose to make it with cauliflower "rice" and loooooved how it turned out.  I could have eaten the entire head of cauliflower!

Coconut “Rice”

Ingredients

  • 1 cup full fat coconut milk
  • 1/2 cup water
  • 1 large head of cauliflower, trimmed and washed
  • 2 slices of fresh ginger, peeled (about inch in size)
  • 1/2 tsp sea salt
  • 1-2 tbsp toasted unsweetened coconut shreds (optional)

Instructions

  1. Place raw cauliflower in a food processor and pulse until rice size pieces are formed
  2. Using a Nut Milk Bag or kitchen towel, drain the excess water out of the cauliflower, set aside
  3. In a saucepan, combine the coconut milk, water and ginger and bring to a boil
  4. Add the cauliflower and simmer for 30 minutes uncovered
  5. Remove from heat and discard the pieces of ginger, add in the salt. Do not add it beforehand, it pulls water out vegetables.
  6. Serve with the toasted coconut sprinkled over top

This could easily be sweetened with something like Swerve and reduce the amount of salt to make it a sweet treat.  Another idea is to add protein powder of choice and eat it like a hot breakfast cereal (maybe even add some grass-fed butter).  You could also do something similar to my Pumpkin Spice Cream Of "Wheat Recipe and add in eggs.

Kate's Healthy Cupboard - Gluten Free Recipes
In Side Dishes, Vegetables, Recipes Tags Coconut Milk, Egg-Free, Low Carb, Nut-Free, Paleo, Vegan
1 Comment
Older Posts →
download.jpeg

Welcome to Kate's Healthy Cupboard! A place for healthy, grain free recipes, some low carb recipes, safe beauty and products for the home  and more...


>>  CONNECT WITH KATE  <<

pinterest.png
facebook.png
instagram.png

>>  SUBSCRIBE  <<

Success! Now check your email to confirm your subscription.

There was an error submitting your subscription. Please try again.


>>  SEARCH RECIPES  <<


Copyright 2016 Kate's Healthy Cupboard  ||  Website Design