• Blog
  • Recipes
  • Lifestyle
  • Safer Skincare
  • About
  • Contact
Menu

Kate's Healthy Cupboard

Street Address
City, State, Zip
Phone Number
Healthy Lifestyle, Healthy Grain Free Recipes

Your Custom Text Here

Kate's Healthy Cupboard

  • Blog
  • Recipes
  • Lifestyle
  • Safer Skincare
  • About
  • Contact

Chocolate Candy Cookie Bars

August 20, 2015 Kate
Chocolate Candy Cookie Bars

Oh my goodness it' been way too long....hope I remember how to do a blog post!!  I haven't been experimenting in the kitchen for awhile for many reasons, but mainly the lack of time and the desire to not eat so many baked goods!!  I love baking, but I just don't need to be eating as many goodies as I was.  Please read the end of this post to see what has consumed most of my time and I wouldn't have it any other way!!

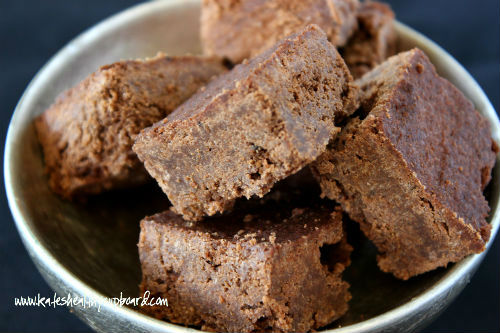
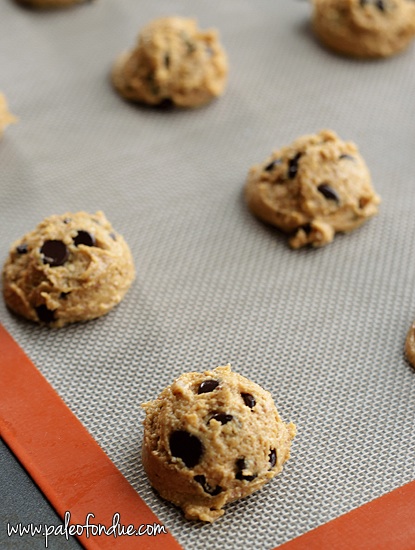
These cookie bars are so fun and yummy!!!  They are made from Cassava Flour which makes them nut free, grain free and of course gluten free!!  Cassava is a starchy root also known as yuca.  You are seeing cassava chips on store shelves and yuca fries on menus.  The flour acts similar to glutinous flour and the company I buy it from, Otto's Natural, says you can swap it in a recipe 1:1.  I have found that you need less cassava flour, it absorbs so much liquid!!  I love the finished product and the moisture and texture it provides in baked goods!!  I plan to experiment more with it as we head into fall and winter...baking season!!!

Another new ingredient I used in this recipe is Little Secrets Chocolate.  I love that candy companies are coming out with healthier versions of M&M's!!  Little Secrets are sweetened with real organic sugar and colored with natural food colorings such as beet powder, turmeric, etc!!   These are found at Natural Grocers and Whole Foods or on Amazon.  They come in Dark, Milk and Peanut Butter....they are all awesome!!!  Of course this recipe can be made with chocolate chips, but the colorful candy makes it that much more fun!!

Chocolate Candy Cookie Bars
Serves: 12

Ingredients

  • 1/2 cup grass-fed butter, softened*
  • 1/2 cup granulated sweetener (I used Swerve to make it lower in sugar)
  • 3/4 cup cassava flour**
  • 1 egg
  • 1 tbsp non dairy milk
  • 1 tsp vanilla extract
  • 1/2 tsp gluten free baking powder
  • 1/4 tsp sea salt
  • 3/4 cup chocolate candies or chips**

Instructions

  1. In a large mixing bowl, combine the flour, baking powder and salt, set aside
  2. Cream the softened butter with the sugar
  3. Add in the vanilla, milk and egg, mix well
  4. Combine the two bowls and mix until combined
  5. Fold in the chocolate pieces or chips
  6. Spread the batter into an 8x8 greased cookie pan
  7. Bake at 350 for about 28 minutes or until golden
  8. Let cool before cutting
  9. Store in an airtight container. I prefer storing these in the fridge and eating them cold!

Notes

*Softened coconut oil should work to make this dairy free
**Links for Cassava Flour and Chocolate Candy are in the body of the post above recipe.

If you are an Amazon shopper, would you be so kind to use my affiliate link to make your purchases.  It is at no cost to you, it does provide a tiny kickback to Kate’s Healthy Cupboard.  This allows me to continue making and testing recipes for free.  Thanks so much!!

I have switched all of my skincare and makeup to a company that is free of 1,500 chemicals!  The European Union bans about 1,400 chemicals and the US bans 11 in an unregulated industry!  I am so particular about what goes into my body, I need to be just as picky as to what goes on my body!  Your skin is your largest organ and absorbs chemicals into the bloodstream faster than the gut does!  I am vain when it comes to my skin and was so thrilled to find products that are safe, non toxic, but are still anti-aging and work!!!  The makeup is chic, on trend and high performing!  Check out BeautyCounter for more info!!  Their mission is to get safe products into the hands of everyone!  I feel compelled to help educate and share this mission!  

Kate's Healthy Cupboard - Gluten Free Recipes
In Recipes, Desserts4 Tags Chocolate, Cookies, Dairy Free, Nut-Free, Swerve
Comment

Cranberry Salsa

November 10, 2014 Kate
Cranberry Salsa
Cranberry Salsa

This is one of my favorite appetizers to serve during the holiday season!!!  The original recipe includes a cream cheese and goat cheese spread that you pour this over.  It is fantastic with tortilla chips and crackers!  I can no longer tolerate dairy so plain salsa is it for me...delicious on it's own as well!

I might actually use this on my turkey this year instead of gravy for Thanksgiving dinner.  It's almost like a cranberry relish and could be used over any meat or fish!  I made the salsa sugar free by using  Swerve instead of white sugar.  Cranberries are very low in sugar so they are perfect for those trying to stay as low carb as possible during the holidays.

Cranberry Salsa

Ingredients

  • 3 cups fresh or frozen cranberries (thawed)
  • 1 jalapeno, seeded and chopped
  • ½ cup cilantro, chopped
  • 1 bunch green onions, chopped (about 4-5)
  • 1/3-1/2 cup sugar (I used Swerve for no sugar option)
  • Juice of 2 limes

Instructions

  1. Place all of the ingredients in a food processor. Blend until desired consistency
  2. Refrigerate for an hour or overnight
  3. Serve with chips or crackers as salsa or pour over cheese ball (directions in the notes below)

Notes

Cheese Ball:
8oz Cream Cheese, softened (I prefer whipped so it spreads easier on crackers)
4oz butter, softened
2 oz goat cheese
Mix together in a food processor until smooth. Spoon into a bowl that is wrapped with plastic. Wrap and chill until set.

If you want to try Swerve or need to order more, use coupon code KATE10 for a 10% discount.  Swerve is my favorite sugar replacement.  It is the only sugar alcohol that will not cause tummy troubles and it does not raise blood glucose levels.

If you are an Amazon shopper, would you be so kind to use my affiliate link to make your purchases.  It is at no cost to you, it does provide a tiny kickback to Kate’s Healthy Cupboard.  This allows me to continue making and testing recipes for free.  Thanks so much!!

I have recently switched all of my skincare and makeup to a company that is free of 1,500 chemicals!!  I am so particular about what goes into my body, I need to be just as picky as to what goes on my body!  Your skin is your largest organ and absorbs chemicals into the bloodstream faster than the gut does!  I am vain when it comes to my skin and was so thrilled to find products that are anti-aging and work!!!  Check out BeautyCounter for more info!!  You will love it!!  Give the gift of safe skincare this holiday season, gift sets available

Kate's Healthy Cupboard - Gluten Free Recipes
In Dips and Spreads, Dressings and Condiments, Recipes, Snacks and Appetizers3 Tags Egg-Free, Holiday, Low Carb, Nut-Free
4 Comments

Bacon Meatloaf

November 4, 2014 Kate
Breakfast Meatloaf
Breakfast Meatloaf

I have been sitting on this recipe for over six months until I got a good picture!  Meatloaf is not my favorite to photograph, but this is a fantastic recipe!!  Who doesn't like sausage and bacon thrown together with some beef!!!  We eat this for dinner, but it's perfect for breakfast too.

Breakfast isn't complete without potatoes or hash browns of some sort.  I wanted to keep this recipe lower carb so I opted for boiled jicama instead of potatoes.  Either one will work and you could really use any type of potato, taro or yucca.  The key is to par-boil them to soften them up before hand.

Breakfast Bacon Meatloaf
Serves: 6

Ingredients

  • 1 1/2 lbs grass-fed ground beef or bison
  • 1/2 lb pork breakfast sausage
  • 1/2 lb bacon (about 6 pieces), sliced into 1 inch pieces
  • 3/4 cup jicama, cubed and softened (potatoes can be substituted)*
  • 1/2-3/4 cup onion, diced
  • 1 egg
  • 1 tsp fennel seed
  • 1/2 tsp sea salt
  • 1/4 tsp garlic powder
  • 1/4 tsp pepper

Instructions

  1. Brown the breakfast sausage, disgard the grease and set aside.
  2. Cook the bacon pieces until crispy or desired tenderness, set aside. Keep the grease in the pan!
  3. Saute the onions and softened jicama in the bacon grease, add in all of the seasoning. Cook until the onions are translucent
  4. In a large mixing bowl, combine the beef, sausage and bacon with the egg. Add in the onion mixture using your hands to mash it all together
  5. Form into a loaf and place in a greased casserole dish. Drizzle with ketchup
  6. Bake at 350 for about 55 minutes
  7. This is fantastic as leftovers too!!

Notes

*To soften the jicama, cook in boiling water until soft. Takes 45-60 minutes depending on the size of your cubes. I cut them about 1/4 inch squares in size. Use the entire jicama and save the remaining pieces to saute as potatoes another time!

If you prefer to make your own ketchup, here is a low carb recipe.

If you are an Amazon shopper, would you be so kind to use my affiliate link to make your purchases.  It is at no cost to you, it does provide a tiny kickback to Kate’s Healthy Cupboard.  This allows me to continue making and testing recipes for free.  Thanks so much!!

I have recently switched all of my skincare and makeup to a company that is free of 1,500 chemicals!!  I am so particular about what goes into my body, I need to be just as picky as to what goes on my body!  Your skin is your largest organ and absorbs chemicals into the bloodstream faster than the gut does!  I am vain when it comes to my skin and was so thrilled to find products that are anti-aging and work!!!  Check out BeautyCounter for more info!!  You will love it!! 

Kate's Healthy Cupboard - Gluten Free Recipes
In Recipes, Breakfasts2, Entrees2 Tags Bacon, Beef, Breakfast, Brunch, Nut-Free
1 Comment

Flourless Pumpkin Cookies

October 6, 2014 Kate
Flourless Pumpkin Cookies

It is Pumpkin Palooza time!!!  Every recipe on Pinterest and Facebook seem to be fall related and involve a lot of pumpkin!!!  I have a couple of hopefully unique recipes to share this fall season...including these Flourless Pumpkin Cookies with a chocolate chip option!!  Many people have requested nut free recipes, hence my addiction to coconut butter based goodies!  I do have to admit, these would be darn good with almond butter too, so feel free to use it in place of the coconut butter.

These little good for you fat bombs can be enjoyed guilt free when you use my favorite sweetener Swerve!  My mom described these like taking a bite of pumpkin pie.  They are moist and melt in your mouth delicious!!   These cookies are super easy to make and have a short list of ingredients!  Enjoy

Flourless Pumpkin Cookies
Prep time: 5 mins
Cook time: 15 mins
Serves: 15-18

Ingredients

  • 1/2 cup Organic Coconut butter
  • 1/2 cup canned pumpkin, packed
  • 1 egg
  • 1/2 cup granulated sweetener (I used Swerve for no sugar option)
  • 2 tsp cinnamon
  • 3/4 tsp clove
  • 3/4 tsp ginger
  • 3/4 tsp nutmeg
  • 1/4 tsp sea salt
  • 1/2 cup dark chocolate chips, optional (Use Enjoy Life Semi Sweet Chocolate Chips) 

Instructions

  1. Place the coconut butter, pumpkin and egg in a food processor and combine until smooth
  2. Add in the sweetener, spices and salt and mix well
  3. Place the batter in a bowl and stir in chocolate chips (optional)
  4. Spoon the dough onto a parchment lined cookie sheet
  5. Slightly press down the dough since these will not spread. If dough is too sticky, bake for a few minutes, remove and then you will be able to press down
  6. Bake at 350 for about 15 minutes
  7. Remove cookies and place on a cooling rack to set up
  8. Store in an airtight container, I prefer a glass jar

Notes

*To soften the coconut butter, place the jar into a saucepan filed with water. Heat over medium heat until it has softened.
We like cinnamon and spice, you may start with less of each and increase to desired taste. Any nut butter will work in place of the coconut butter. Almond butter would be awesome!!

If you are an Amazon shopper, would you be so kind to use my affiliate link to make your purchases.  It is at no cost to you, it does provide a tiny kickback to Kate’s Healthy Cupboard.  This allows me to continue making and testing recipes for free.  Thanks so much!!

I have switched all of my skincare and makeup to a company that is free of 1,500 chemicals!  The European Union bans about 1,400 chemicals and the US bans 11 in an unregulated industry!  I am so particular about what goes into my body, I need to be just as picky as to what goes on my body!  Your skin is your largest organ and absorbs chemicals into the bloodstream faster than the gut does!  I am vain when it comes to my skin and was so thrilled to find products that are safe, non toxic, but are still anti-aging and work!!!  The makeup is chic, on trend and high performing! Check out Beautycounter for more info!!  Their mission is to get safe products into the hands of everyone!  I feel compelled to help educate and share this mission!  


Kate's Healthy Cupboard - Gluten Free Recipes
In Recipes, Desserts4 Tags Coconut Creme, Flourless, Holiday, Low Carb, Nut-Free, Pumpkin, Swerve
4 Comments

Ginger Turmeric Cookies

August 25, 2014 Kate
Ginger Tumeric Cookies

I have another flourless and nut free cookie for you!!  And...these are anti-inflammatory cookies!!  If you have not heard of turmeric or curcumin and all of it's benefits...you must go google it now!  I try to get turmeric in my diet daily and supplement with it as well.  I use the spice on meat, the root in my green drinks or in my ginger lemonade.  Ginger is also a health super star for many reasons and pairs well with turmeric!  Adding a bit of black pepper to whatever you are adding turmeric to, it increases turmeric's bioavailability.  That is why you will find black pepper in this recipe...and I wanted to give it a bit of bite!

Ginger Turmeric Cookies
Serves: 15

Ingredients

  • 1 cup coconut butter, softened (also known as coconut manna or coconut creme concentrate)*
  • 1/2 cup granulated sweetener, I used Swerve 
  • 1 egg
  • 1 tsp vanilla extract
  • 2 heaping tsp ground ginger
  • 1 tsp turmeric powder
  • 1/8 tsp or more black pepper
  • 1/4 tsp sea salt
  • 1/4 tsp baking soda

Instructions

  1. Place the coconut butter, egg and vanilla in a food processor and combine
  2. Add in the sweetener, soda and all spices, blend until combined
  3. Form dough into 1 inch balls and place on a parchment lined cookie sheet**
  4. Press each cookie down with your palm, these don't spread much
  5. Bake at 350 or 10-15 minutes or until a bit brown
  6. These cookies are fragile when warm, so let them cool for a few minutes on the cookie sheet. Remove and let them cool completely on a cooling rack. They will harden up as they cool.
  7. Store in an airtight container

Notes

*To soften the coconut butter, place the jar in a saucepan filled with water over medium heat. Make sure you have removed the top layer of coconut oil, save it for another use. Don't melt the butter completely, just soften it.
**If dough does not form into a ball because it is too runny, place batter in the fridge for a few minutes to harden it.


If you are an Amazon shopper, would you be so kind to use my affiliate link to make your purchases.  It is at no cost to you, it does provide a tiny kickback to Kate’s Healthy Cupboard.  This allows me to continue making and testing recipes for free.  Thanks so much!!

I have switched all of my skincare and makeup to a company that is free of 1,500 chemicals!  The European Union bans about 1,400 chemicals and the US bans 11 in an unregulated industry!  I am so particular about what goes into my body, I need to be just as picky as to what goes on my body!  Your skin is your largest organ and absorbs chemicals into the bloodstream faster than the gut does!  I am vain when it comes to my skin and was so thrilled to find products that are safe, non toxic, but are still anti-aging and work!!!  The makeup is chic, on trend and high performing! Check out Beautycounter for more info!!  Their mission is to get safe products into the hands of everyone!  I feel compelled to help educate and share this mission!  

Kate's Healthy Cupboard - Gluten Free Recipes
In Recipes, Desserts4 Tags Coconut Creme, Cookies, Flourless, Nut-Free, Swerve
7 Comments

Brownie Fudge

June 26, 2014 Kate
Brownie Fudge Recipe

Sometimes you just throw some stuff in a bowl and hope for the best...I got what I was looking for with this one!!  I wanted a fudge, but cooked, so kind of a brownie at the same time.  A fat bomb is what some people may call this since it's loaded with healthy fats like coconut butter, full fat coconut milk and grass-fed butter!  These are nut free and are best stored in the refrigerator!!

Brownie Fudge
Ingredients

  • 3/4 cup coconut cream/butter, melted
  • 1/3 cup full fat coconut milk cream (The thick cream on top of a chilled can of coconut milk)
  • 2 tbsp grass-fed butter, melted (coconut oil or ghee would work)
  • 1 pastured egg
  • 2 tsp vanilla extract
  • 5 tbsp cacao powder
  • 3/4-1 cup granulated sweetener (I used Swerve for no sugar option)
  • 1/2 tsp vanilla bean powder
  • 1/4 tsp sea salt
  • 1/4 tsp baking soda

Instructions

  1. In a mixing bowl, combine the cacao powder, sweetener, vanilla bean powder, soda and salt, set aside
  2. Place the melted coconut cream/butter, grass-fed butter, coconut milk cream in a bowl and beat until smooth
  3. Add in the egg and vanilla extract, beat until combined
  4. Add the dry ingredients to the wet and beat until all the cacao lumps are gone!
  5. Spread the mixture into either a 6x6 or 8x8 greased pan, depending on how thick you want them
  6. Bake at 350 for about 20-25 minutes until edges get brown. The center may seem uncooked, especially in the 6x6 pan, but that's ok
  7. Let the pan cool and then place in the refrigerator to cool completely
  8. These are best stored in the refrigerator

Notes

The easiest way to melt coconut cream/butter is to place the jar in a pot and bring the water to a boil.


If you are an Amazon shopper, would you be so kind to use my affiliate link to make your purchases.  It is at no cost to you, it does provide a tiny kickback to Kate’s Healthy Cupboard.  This allows me to continue making and testing recipes for free.  Thanks so much!!

I have switched all of my skincare and makeup to a company that is free of 1,500 chemicals!  The European Union bans about 1,400 chemicals and the US bans 11 in an unregulated industry!  I am so particular about what goes into my body, I need to be just as picky as to what goes on my body!  Your skin is your largest organ and absorbs chemicals into the bloodstream faster than the gut does!  I am vain when it comes to my skin and was so thrilled to find products that are safe, non toxic, but are still anti-aging and work!!!  The makeup is chic, on trend and high performing! Check out Beautycounter for more info!!  Their mission is to get safe products into the hands of everyone!  I feel compelled to help educate and share this mission!  

Kate's Healthy Cupboard - Gluten Free Recipes
In Recipes, Desserts4 Tags Chocolate, Coconut Creme, Coconut Milk, Dairy Free, Flourless, Nut-Free
13 Comments

Kombucha and Kefir Jello

May 6, 2014 Kate
Kombucha and Kefir Jello Recipe

We all know the benefits of Kombucha, Kefir and Gelatin, so why not combine them all!!  These jello cubes or gummies are full of probiotics and some protein from the gelatin along with many other benefits of the gelatin.  I love both kombucha and kefir, but prefer to drink Kevita Kefir since it is lower in sugar and made from coconut water.  If you have not tried Kevita, I highly suggest you do!!  It's not as carbonated as kombucha, but still delicious and refreshing.  They just came out with new flavors including Tangerine, my favorite!!  My other favorite is the Lemon Cayenne, but they are all good!  If you are struggling with candida, I highly recommend you stay away from most kombuchas, as they do have some added sugar.

Kombucha and Kefir Jello

Ingredients

  • 1 bottle (about 15 ounces) Kombucha or Kefir
  • 3 tbsp grass-fed gelatin, I prefer Great Lakes Gelatin
  • Sweetener of choice (optional, I used 1 teaspoon of Swerve)
  • ¾ cup water, divided into ¼ and ½ cup

Instructions

  1. Bring 1/2 cup water to a boil
  2. Sprinkle the gelatin in the bottom of a mixing bowl and pour the 1/4 cup water over it entirely to soften
  3. Once the water is BOILING, pour it over the gelatin as you stir it. Stir until all of the clumps are gone. You may need to mash some of the clumps, but it will all dissolve.
  4. Add the sweetener, stir and let the gelatin cool for a couple minutes. Don't wait too long or it will start to harden!
  5. Slowly add the kombucha or kefir stirring the entire time, it may fizz a little
  6. Pour into a mold or a 6x6, 8x8 or loaf pan depending on how thick you want the jello
  7. Place in refrigerator to set up
  8. Cut into desired size and serve

Notes

*If you want a more gummy type texture, add a couple more tablespoons of gelatin. You may need to increase the amount of boiling water to dissolve it all.

If you want to try Swerve or need to order more, use coupon code KATE10 for a discount.  If you are an Amazon shopper, would you be so kind to use my affiliate link to make your purchases.  It is at no cost to you, it does provide a tiny kickback to Kate’s Healthy Cupboard.  This allows me to continue making and testing recipes for free.  Thanks so much!!

Kate's Healthy Cupboard - Gluten Free Recipes
In Recipes, Snacks and Appetizers3 Tags Dairy Free, Egg-Free, Gelatin, Nut-Free
1 Comment

Dairy Free Lemon Gelato

April 22, 2014 Kate
Dairy Free Lemon Gelato Recipe

I absolutely love all things lemon...even this gelato in the middle of winter!  I made this recipe months ago but decided to wait for some warmer weather to share it with you!  If you love lemon and low carb desserts, make sure to head over to All Day I Dream About Food's Luscious Low Carb Lemon Desserts Round Up!!  Even if you aren't a lemon lover, check out Carolyn's website anyway!  She has a ton of amazing looking dishes and desserts...and she loves Swerve as much as I do so her treats are low to no sugar!!

Dairy Free Lemon Gelato
Serves: 4

Ingredients

  • 1 can full fat coconut milk
  • 1 cup non-dairy milk
  • 4 egg yolks
  • 1/2-3/4 cup granulated sweetener ( I used Swerve for no sugar option)
  • 3/4 cup fresh lemon juice (2-3 lemons)
  • 2 heaping tbsp grated lemon peel

Instructions

  1. Whisk the egg yolks and set aside
  2. Combine the milks and sweetener in a heavy saucepan over medium high heat and bring to a simmer
  3. Once the milk is simmering, reduce the heat to low
  4. Slowly whisk about a ladle full of milk into the egg yolks, whisking the entire time
  5. Slowly add the egg yolk mixture back into the warm pan, whisking the entire time. Add the lemon peel at this time
  6. Continue cooking the mixture on low and stirring until it thickens up, coats the back of a spoon
  7. Remove from heat and stir in the lemon juice. Strain the mixture to remove any seeds and the lemon peel
  8. Place in the fridge or freezer to cool
  9. Once cooled, run thru an ice cream maker or freeze it in a loaf pan or use the ziploc method*

Notes

*I haven't tried this, but you simply pour the mixture into a ziploc and freeze. When you are ready to serve the Gelato, place the frozen mixture into a blender and blend until smooth!

Affiliate Banners_Generic_728x90-2.jpg
In Recipes, Desserts3 Tags Coconut Milk, Dairy Free, Nut-Free, Swerve
15 Comments

Coconut Curry Cauliflower (Red Ape Cinnamon Giveaway)

March 27, 2014 Kate
Coconut Curry Cauliflower Recipe

I'm taking roasted cauliflower to a whole different level!  Instead of using an oil or butter to roast the cauliflower, I decided to use full fat coconut milk for the fat and for flavor.  I also used Organic Buddha Shake Curry Mix from Red Ape Cinnamon company for the curry powder.  To read more about Red Ape Cinnamon and enter to win a bunch of their awesome cinnamon and spices, including the curry mix I used, head over to my previous post.  While you're there, check out the delicious Flourless Snickerdoodle Cookie Recipe if you haven't yet!!

Coconut Curry Cauliflower
Ingredients
  • 1 head of cauliflower, cut into pieces
  • 1/2 cup full fat coconut milk*
  • 1 1/2 tsp or more Red Ape Cinnamon Organic Buddha Shake Curry Mix (or any curry blend)
  • sea salt to taste
Instructions
  1. Whisk together the coconut milk and curry powder in a bowl
  2. Place 1/3 of the cauliflower pieces in the milk mixture and coat.
  3. Place the cauliflower onto a parchment lined cookie sheet and repeat the process with the remaining cauliflower. Pour the remaining milk over top and sprinkle with sea salt
  4. Bake at 425 for about 25 minutes or until the cauliflower starts to brown
  5. Serve hot
Quick notes

*Use a milk that tends to be thicker so it doesn't completely run off the cauliflower. I prefer Whole Foods brand or Thai Kitchen in the red and black can.

If you are an Amazon shopper, would you be so kind to use my affiliate link to make your purchases.  It is at no cost to you, it does provide a tiny kickback to Kate’s Healthy Cupboard.  This allows me to continue making and testing recipes for free.  Thanks so much!!

Kate's Healthy Cupboard - Gluten Free Recipes
In Vegetables, Recipes Tags Coconut Milk, Egg-Free, Nut-Free, Paleo, Vegan, Vegetables
Comment

Flourless Nut Free Snickerdoodle Cookies

March 24, 2014 Kate
Flourless Nut Free Snickerdoodle Cookies Recipe

So excited to share this nut-free, dairy free and starch free cookie recipe and to introduce you to Red Ape Cinnamon!  I randomly came across this company and was so thrilled I did!  They have an organic cinnamon that is sustainably harvested that is slowly ground to sweet, fragrant perfection. If it's good enough for some of the most discerning chefs, it must be good enough for us!  For any of you that have been to Portland, you know of the famous Salt & Straw and Scoop Shop Ice Cream shops.  They use Red Ape Cinnamon in their Snickerdoodle ice cream....yum!!!  Why Red Ape...5% of the profits from their cinnamon products go to protecting orangutans and their habitat.  A portion of the funds also go towards adopting orangutans.  So not only are their products fantastic, but they are also doing great things for the environment!

Cinnamon has many health benefits including decreasing blood sugar levels, but not all cinnamon is created equal!  I actually just heard something this morning that cheaper cinnamon like the brand you buy in huge containers at Costco, usually aren't made completely of cinnamon!  Yes it may taste good from the cinnamon flavor they add, but you certainly aren't getting the health benefits!  Besides the amazing taste of Red Ape Cinnamon, another bonus is that you don't need very much to add incredible flavor.

You can read more about Red Ape Cinnamon and how it came to be on their website.  It is not just cinnamon, they have a variety of awesome and unique spice blends that all include cinnamon.  I used their Premium Ground Cinnamon and their Cinnamon Sugar Shake in this cookie recipe.  Stay tuned later this week for a savory recipe using another one of their spice blends!  And......one of you lucky readers is going to win a jar of each of their products!!!  Comment on this post or on Kate's Healthy Cupboard Facebook where the recipe has been posted and let us know what product you can't wait to try from Red Ape Cinnamon!!!  Please go like Red Ape Cinnamon on Facebook, follow them on Pinterest and check out their website for more cinnamon recipes.  I will randomly select a winner on Monday, March 31st!  You will have two chances to win, comment on this post and on the upcoming savory post later this week!!

If you have been grain free for a while, you know it's hard to replicate glutinous dessert recipes exactly.  Almond flour does a pretty good job and so does adding some starch, but I am really trying to create some nut free, low carb options for people.  This Snickerdoodle Recipe will definitely cure your sweet tooth, they almost melt in your mouth from the coconut butter...Enjoy!

Recipe: Flourless Nut Free Snickerdoodle CookiesIngredients

Makes about 12

  • 1 cup coconut creme/butter*, softened
  • 1 egg
  • 1/2 cup granulated sweetener (I used Swerve for no sugar option)
  • 2 tsp vanilla
  • 1/4 tsp baking soda
  • 1/4 tsp baking powder (gluten and corn free)
  • 1/4 tsp sea salt
Cinnamon Coating**:
  • 1 tbsp Red Ape Cinnamon Sugar Shake
  • 1 tsp Red Ape Premium Cinnamon
  • 2 tbsp granulated sweetener (I used combo of Swerve and Coconut Palm Sugar. You could use all Cinnamon and Sugar Shake, but I wanted to cut down on the sugar)
Quick Notes:
*I order coconut creme from Tropical Traditions or you can usually find the Artisana Brand at Whole Foods or other natural grocery stores. The top layer is coconut oil, so you may need to scrape that off to get to the creme, but save the oil for another use. I soften it by placing the jar in a small saucepan of simmering water.
**You can use any combo of cinnamon and sugar in a 1:1 ratio but use a bit more sugar than cinnamon)
Instructions
  1. In a mixing bowl or food processor, combine the coconut butter/creme, egg (whisked if using a bowl) and vanilla
  2. Add the 1/2 cup sugar, soda, powder and salt, mix well.  Make sure no clumps remain in dough
  3. In a small bowl, combine the cinnamon and sugar mixture for the coating
  4. Roll the dough into one inch or larger dough balls. If batter is too runny from the coconut creme, place it in the frig for a few minutes to harden
  5. Roll each ball in the cinnamon sugar mix and coat well. I sort of mashed it into each ball and then rerolled each ball
  6. Place the balls on a parchment lined cookie sheet and press down with the palm of your hand. Cookies should not spread much unless batter is really soft
  7. Take the leftover cinnamon sugar mixture and sprinkle it over top the cookies
  8. Bake at 350 for about 12 minutes
  9. Remove from heat and let the cookies sit on the cookie sheet until they are set up. They will fall apart if you try to remove them when hot
  10. Place on a cooling rack to finish setting up

If you want to try Swerve or need to order more, use coupon code KATE10 for a 10% discount.  Swerve is my favorite sugar replacement.  It is the only sugar alcohol that will not cause tummy troubles and it does not raise blood glucose levels.

If you are an Amazon shopper, would you be so kind to use my affiliate link to make your purchases.  It is at no cost to you, it does provide a tiny kickback to Kate’s Healthy Cupboard.  This allows me to continue making and testing recipes for free.  Thanks so much!!

*I have recently switched all of my skincare and makeup to a company that is free of 1,500 chemicals!!  I am so particular about what goes into my body, I need to be just as picky as to what goes on my body!  Your skin is your largest organ and absorbs chemicals into the bloodstream faster than the gut does!  I am vain when it comes to my skin and was so thrilled to find products that are anti-aging and work!!!  Check out BeautyCounter for more info!!  You will love it!!

Kate's Healthy Cupboard - Gluten Free Recipes
In Recipes, Desserts3 Tags Coconut Creme, Cookies, Dairy Free, Flourless, Nut-Free, Paleo
9 Comments

Nut Free Fudge Brownies

March 20, 2014 Kate
Grain & Nut Free Fudge Brownies

Are you a fudgy brownie or cake-like brownie person?  I am definitely a fudgy type...I'd eat cake if I wanted cake!  This brownie recipe is so dense and fudge like, they almost melt in your mouth! I debated whether I call this recipe brownie fudge or fudge brownies..either way, they are delicious!

I am trying to create recipes that are nut free or lower in nuts.  I think almond flour works great in baked goods, but I want to make something that everyone can have.  Some may say tapioca or arrowroot makes these too high in carbs, not so fast!  The 1/4 cup of flour is adds 25 carbs and unless you eat the entire pan, that's not much per serving!  I also used Swerve to keep the sugar very low.  If you want to try Swerve or need to order more, use coupon code KATE10 for a discount.

Grain & Nut Free Brownies
Ingredients
  • 1/4 cup tapioca flour/starch (arrowroot should work, tapioca tends to be a tad bit sweeter)
  • 1/3 cup cacao or cocoa powder
  • 1 cup granulated sweetener ( I used Swerve for no sugar option plus a tbsp coconut palm sugar)
  • 6 tbsp grass-fed butter (see dairy free option below)*
  • 2 oz 100% cacao (4 squares)
  • 3 pastured eggs
  • 2 tbsp full fat coconut milk
  • 1 tbsp vanilla extract
  • 1/2 tsp sea salt
Instructions
  1. Melt the chocolate squares, butter and coconut milk in a double broiler
  2. Whisk the eggs and vanilla in a small bowl and set aside
  3. In a large mixing bowl combine the tapioca flour, cacao powder, sweetener and salt
  4. Add the egg mixture to the flour mixture and stir a couple times, doesn't need to be combined well
  5. Once the chocolate is melted, pour it over the egg and flour mixture and stir until combined
  6. Pour batter into an 8x8 greased baking dish
  7. Bake at 350 for 25-30 minutes
  8. Store in an airtight container
Quick Notes:

*I haven't tried this with coconut oil, but it should work.  I would only do about 5 tbsp of oil.

You can also use chocolate chips or any high cacao chocolate bar in place of the 100% cacao.  I wanted to make these dairy free and sugar free or I would have used my favorite chocolate chips.  You may need to reduce the amount of sweetener.


If you are an Amazon shopper, would you be so kind to use my affiliate link to make your purchases.  It is at no cost to you, it does provide a tiny kickback to Kate’s Healthy Cupboard.  This allows me to continue making and testing recipes for free.  Thanks so much!!

*I have recently switched all of my skincare and makeup to a company that is free of 1,500 chemicals!!  I am so particular about what goes into my body, I need to be just as picky as to what goes on my body!  Your skin is your largest organ and absorbs chemicals into the bloodstream faster than the gut does!  I am vain when it comes to my skin and was so thrilled to find products that are anti-aging and work!!!  Check out BeautyCounter for more info!!  You will love it!!

Kate's Healthy Cupboard - Gluten Free Recipes
In Recipes, Desserts3 Tags Chocolate, Coconut Milk, Dairy Free, Nut-Free, Swerve
Comment

Sauteed Radishes

February 8, 2014 Kate
Sauteed Radishes Recipe

How about a savory Valentine's Recipe!!!  Don"t worry, more chocolate and sweets to come!!! It's so funny how much more attention my treat recipes get than recipes like these radishes!

I bought the Easter Egg Radishes that are bright pink, red and white for this dish, but the color diminishes a ton when you cook them.  These are so pretty and could be served cold drizzled with a dressing for your Valentine's Day dinner as an alternative.

radishes
radishes

I had never tried cooking radishes until today...yum!!  You don't even have to be a radish fan to like this recipe.  So much of the "spiciness" is removed and they almost taste like little potatoes, maybe that's because of the butter.  I think radishes would add a lot of flavor to roasted vegetables, so next time you roast a chicken with veggies, add some radishes.  This is an easy recipe and can be seasoned to your liking!  And, as an added bonus, radishes contain nutrients that detoxify and nourish the body!!!

Sauteed Radishes
Ingredients
  • 2 bunches of radishes
  • 2-3 tbsp grass-fed butter, ghee or coconut oil
  • 1-2 tsp sage (I used dried)
  • sea salt and pepper to taste
Instructions
  1. Wash and remove the leaves and stems from the radishes. Cut in half or quarters depending on the size of the radishes
  2. Melt the butter over medium high heat in a skillet and toss in the radishes
  3. Let cook for about 6-7 minutes or until soft and browned, stir occasionally
  4. Sprinkle the sage, salt and pepper
Variations

Diced onions and/or garlic would also be good in this recipe.

If you are an Amazon shopper, would you be so kind to use my affiliate link to make your purchases.  It is at no cost to you, it does provide a tiny kickback to Kate’s Healthy Cupboard.  This allows me to continue making and testing recipes for free.  Thanks so much!!

*I have recently switched all of my skincare and makeup to a company that is free of 1,500 chemicals!!  I am so particular about what goes into my body, I need to be just as picky as to what goes on my body!  Your skin is your largest organ and absorbs chemicals into the bloodstream faster than the gut does!  I am vain when it comes to my skin and was so thrilled to find products that are anti-aging and work!!!  Check out BeautyCounter  for more info!!  You will love it!!

Kate's Healthy Cupboard - Gluten Free Recipes
In Vegetables, Recipes Tags Dairy Free, Egg-Free, Nut-Free, Paleo, Vegan, Vegetables
2 Comments

Nut Free Chocolate Chip Cookies

February 6, 2014 Kate
Nut Free Chocolate Chip Cookies Recipe

I am very excited to introduce you to Sharon from the blog Paleo Fondue!  "It means gather at the table for plates of quality food, savor the natural flavors, and indulge in a little dessert! You can have cheese if you want."  Her site is a must to go check out!  She has a ton of delicious recipes...Bang Bang Shrimp or Chorizo and Green Chili Frittata or how about these awesome looking chocolate chip cookies!  Sharon was nice enough to create this recipe and do a guest post for all of my followers.  Please be sure to check out her site, "like" her on Facebook and follow her on Pinterest so you catch all of her recipes!!!

There are a lot of chocolate chip cookie recipes, I have to wonder what kind of contribution I can do to the classic dessert. Well gluten free, grain free, soy free, dairy free, refined sugar free, and nut free? That’s a lot of things NOT in this cookie. But what it does have is an amazing  warm ooey gooey classic cookie taste.

Nut Free Chocolate Chip Cookies Recipe

It’s a cookie that is classic and I’m weary to diverge too far from an original recipe. Chocolate chip cookies are special to everyone. My grandma used to send me a box filled with an assortment of homemade cookies. There were tons of fancy chocolate ones, pretty sugar dusted ones, and ones with intricate decorations. Still, my most favorite in the box are the traditional chocolate chip cookies.

Nut Free Chocolate Chip Cookies Recipe

So it’s no wonder that I took my time perfecting a grain free version. And it sure took quite a few iterations and human taste testing to meet my mile high expectation.  I’ve had cookie aficionados taste test several versions of this. It was like a panel of foodies eating plates of cookies and debating the ratios of the sugars, the textures, the type of spice. Even my mom says “You can’t taste the ‘Paleo’ in these.” It’s her way of saying these are a badass batch of chocolate chip cookies.Select this line to insert text description of recipe here

Nut Free Chocolate Chip Cookies

Ingredients

  • ¼ Cup (45g) Coconut Oil, measured solid
  •  ¼ Cup (48g) Palm Shortening
  •  ¼ cup (40g) of Maple Sugar
  •  ½ cup (80g) of coconut palm sugar
  •  1 cup of Tapioca Starch/Flour
  •  3 Tablespoons (30g) of packed Coconut Flour
  •  1 teaspoon of grain free baking powder
  •  ½ teaspoon of Cinnamon
  •  ¼ teaspoon of Salt
  •  1 Large Egg
  •  ½ cup of Chocolate Chips

Instructions

  1. Preheat the oven to 350F.
  2. Whip together the coconut oil, shortening, maple sugar, and coconut sugar on high speed in a large mixing bowl with a whisk attachment until fluffy.
  3. Sift together the tapioca starch, coconut flour, baking powder, cinnamon, and salt.
  4. Add the egg into the mixing bowl and whip until combined.
  5. Add the dry ingredients in three batches, mixing in between each addition.
  6. Fold in the chocolate chips.
  7. Line a baking sheet with a silpat liner or parchment paper.
  8. Scoop about 2 tablespoons worth of cookie dough onto the lined baking sheet.
  9. Bake at 350F for 11-13 minutes.

Variations

You can sub the maple sugar for an equal amount of coconut sugar.

Notes

From Kate: As many of you know, I prefer to use Swerve as my sweetener.  You can simply replace the coconut and maple sugar in these with Swerve.  I would probably still use a tbsp of each just to give a bit of that maple and caramel taste.

If you want to try Swerve or need to order more, use coupon code KATE10 for a 10% discount.  Swerve is my favorite sugar replacement.  It is the only sugar alcohol that will not cause tummy troubles and it does not raise blood glucose levels.

If you are an Amazon shopper, would you be so kind to use my affiliate link to make your purchases.  It is at no cost to you, it does provide a tiny kickback to Kate’s Healthy Cupboard.  This allows me to continue making and testing recipes for free.  Thanks so much!!

Kate's Healthy Cupboard - Gluten Free Recipes
In Recipes, Desserts3 Tags Chocolate, Cookies, Nut-Free, Swerve
5 Comments

Chocolate Dipped Valentine's Marshmallows

February 3, 2014 Kate
Sugar Free Chocolate Dipped Valentine's Marshmallows

So excited to bring you this fun Valentine's Day Marshmallow Recipe.  I can't really take credit for it...only the pink part and chocolate dipping is my creation.  The best part is that these are naturally colored with beet juice.  The credit goes to Adrienne over at Whole New Mom.  Her website it full of great recipes, DIY remedies, lotions and potions.  Go check her blog out!!! This recipe calls for liquid sweetener and I have not been able to find anything that works in recipes to replace honey, syrup or corn syrup with no sugar.  Adrienne has the answer...vegetable glycerin!!  We have all heard that you shouldn't put anything on your skin that you wouldn't put in your mouth.  Well vegetable glycerin is often times found in skin care as a natural preservative, but also has a bit of sweetness to it and is completely food grade.  What the heck is vegetable glycerin?

According to Wise Geek: Vegetable glycerin can also be made directly from vegetable oil — often coconut or palm oil — by heating it to a high temperature under pressure with water. The glycerin backbone splits off from the fatty acids, and is absorbed by the water, from which it is then isolated and distilled to obtain the pure product. Food-grade vegetable glycerin is 99.7% pure, with the remaining 0.3% being water. Select this line to insert text description of recipe here

Glycerin is widely used in the food industry for two main reasons: it has a sweet taste, but has fewer calories than sugar; and it is hygroscopic, that is, it absorbs moisture from the air. It is therefore used both to sweeten foods and to keep them moist. The compound is metabolized more slowly than sucrose— the type of sugar most commonly found in candy and in processed foods — and therefore does not have such a dramatic effect on blood sugar levels. It also does not contribute to bacterial tooth decay. Foods marketed as being low in carbohydrates are often sweetened with glycerin.

Another major use is in the cosmetics industry. Due to its hygroscopic properties, it is used in many moisturizing skin products, as it seems to help relieve dry skin problems by drawing water up from the lower layers. It is also a component of glycerin soap, which is often used by people with sensitive skin. Lotions containing this compound are also popular.

I did some research to find a source of vegetable glycerine that was from coconut and/or palm oils, not soy oil.  I think the best source is from Wilderness Family Naturals.  They are a trusted company with great products (I have no affiliation)!!!  You can also use Now Foods Vegetable Glycerin that I believe to be a reputable source as well.  The Now Brand can be found in many local health food stores and possibly Whole Foods.  It is sold in the lotion section since many people add it to their homemade lotions.

Recipe: Chocolate Dipped Valentine’s Marshmallows

Original Marshmallow Recipe from Whole New Mom

Ingredients

  • 2 tbsp gelatin from grass-fed cows (I use Great Lakes Gelatin)
  • 1/2 cup cold water that has been beet juice infused (directions below)
  • 1 – 1 1/2 cups granulated sweetener (I used a cup total of Swerve and Xylitol
    mixed for sugar free option)
  • 1/2 cup hot water
  • 1/2 cup liquid sweetener (I used vegetable glycerin for sugar free option, see above for info and where to buy)
  • 2 tsp vanilla extract
  • 1/2 cup dark chocolate chips* (Use Enjoy Life Chocolate Chips for dairy free option)

Instructions

  1. Peel and cut a very small raw beet into about 1 inch chunks. Place the beets in a saucepan along with 1/2 cup of water
  2. Warm the water on low heat to get the beets to bleed. You want really pink/red water. Once you blend this with the gelatin and other ingredients, it really lightens up.
  3. Place the water in the refrigerator to cool for a few minutes.  Remove and discard the beets
  4. In a large mixing bowl or standup mixer, pour the cooled pink water and sprinkle the gelatin over top, let sit
  5. Combine the granulated sweetener, liquid sweetener and additional 1/2 cup hot water in a heavy bottom saucepan
  6. Cook over medium high heat until mixture reaches 240-245 (soft ball stage)
  7. With a hand mixer or standup mixer, start beating the gelatin and beet water as you slowly add in the hot sweeteners.
  8. Slowly add in the vanilla and continue to beat until stiff peaks have formed, thick marshmallow creme
  9. Pour the creme into an 8×8 greased pan (or larger if you want thinner marshmallows)
  10. Let sit and harden. Cut into desired shape and size
  11. Melt the chocolate in a double broiler. Using a toothpick or skewer, dip the marshmallows in the chocolate and let cool
  12. Store in an airtight container. I prefer glass jars

Quick notes

*Use more chocolate if you want to completely coat the marshmallows

Variations

As Adrienne suggests, you can roll marshmallows in coconut, cocoa, nuts or any other topping.


If you want to try Swerve or need to order more, use coupon code KATE10 for a 10% discount.  Swerve is my favorite sugar replacement.  It is the only sugar alcohol that will not cause tummy troubles and it does not raise blood glucose levels.

If you are an Amazon shopper, would you be so kind to use my affiliate link to make your purchases.  It is at no cost to you, it does provide a tiny kickback to Kate’s Healthy Cupboard.  This allows me to continue making and testing recipes for free.  Thanks so much!!


Kate's Healthy Cupboard - Gluten Free Recipes
In Recipes, Desserts3 Tags Chocolate, Dairy Free, Gelatin, Holiday, Nut-Free, Paleo, Swerve, Vegetable Glycerin
5 Comments

Bacon Brussel Sprouts

January 8, 2014 Kate
Bacon Brussel Sprouts

Happy New Year!  I hope everyone had a great holiday season and got a chance to enjoy a few of my treats.  I just finished off the last of the cookies I made for Christmas.  It's so nice to know almost all of my treats were free of sugar since I used Swerve (my favorite sugar alternative) in all my recipes.  If your resolutions include giving up or decreasing the sugar in your diet, I highly recommend trying Swerve!  They are running a special in January and always offer 10% off to my readers with coupon code KATE10.

Enough about the sweets, it's time for vegetables, dinners and breakfasts for a while...well until it's Valentine's recipe time!  We enjoyed this brussels sprout recipe for our Thanksgiving and Christmas dinner.  These were a huge hit by everyone, even the brussels sprout haters liked them...how can you not when bacon is included!   This recipe is not a lot of work and certainly isn't high maintenance!

Recipe: Bacon Brussels Sprouts

Ingredients

  • 3-4 slices bacon, sliced into 1/2 inch pieces
  • 1 lb brussels sprouts, halved or quartered depending on size
  • 1/4 cup onions, diced
  • 1/2 cup water
  • salt and pepper to taste

Instructions

  1. Place the sliced bacon in a skillet over medium heat and cook until tender but not full cooked
  2. Remove all but 2 tbsp of the bacon grease and toss in the onions, cook until onions are translucent and bacon is fully cooked
  3. Add the brussels sprouts, stir to coat with grease
  4. Stir in the water and sprinkle with some salt and pepper
  5. Turn temperature down to low and place a lid on the skillet
  6. Let cook for 30-60 minutes or until very tender. The longer they cook, the more the sprouts take on the bacon flavor
  7. Salt and pepper to taste

If you are an Amazon shopper, would you be so kind to use my affiliate link to make your purchases.  It is at no cost to you, it does provide a tiny kickback to Kate’s Healthy Cupboard.  This allows me to continue making and testing recipes for free.  Thanks so much!!

Kate's Healthy Cupboard - Gluten Free Recipes
In Side Dishes, Vegetables, Recipes Tags Bacon, Low Carb, Nut-Free, Paleo, Vegetables
3 Comments

Flourless Chocolate Candy Cane Cookies

December 23, 2013 Kate
Flourless Chocolate Candy Cane Cookies

One last holiday cookie recipe for you.  These have a bit more sugar in them than I normally prefer due to the candy canes...but I did use all natural candy canes that don't have corn syrup and are colored naturally!

Recipe: Flourless Chocolate Candy Cane Cookies

Ingredients

  • 1 cup cocoa/cacao powder
  • 1 cup granulated sweetener (I used Swerve for no sugar option)
  • 1/2 cup grass-fed butter, softened
  • 1 egg
  • 1 tsp vanilla extract
  • 1/2 tsp baking soda
  • 1/4 tsp sea salt
  • 1/2 cup crushed natural candy canes (5-6 canes)

Instructions

  1. Combine the cocoa, soda and salt in a bowl, set aside
  2. Place sweetener and butter in a food processor or a large bowl and mix well
  3. Add in the egg (whisk if using a mixing bowl) and vanilla
  4. Pour the dry ingredients into the wet and combine until mixed well
  5. Fold in candy canes (batter should be thick)
  6. Use a cookie scoop or roll dough into a ball and place dough on a parchment lined cookie sheet. Do not press down, they will spread
  7. Bake at 350 for about 10 minutes.
  8. Let cool on the cookie sheet before transferring to a cooling rack

Quick notes

We think these are best thin and crispy. If you want them thicker, try refrigerating the dough to harden the butter before cooking

Happy Holidays!

KATE-SIGNATURE small.png

*I have recently switched all of my skincare and makeup to a company that is free of 1,500 chemicals!!  I am so particular about what goes into my body, I need to be just as picky as to what goes on my body!  Your skin is your largest organ and absorbs chemicals into the bloodstream faster than the gut does!  I am vain when it comes to my skin and was so thrilled to find products that are anti-aging and work!!!  Check out Beautycounter for more info!!  You will love it!!

Affiliate Banners_Generic_728x90-1.jpg


In Recipes, Desserts3 Tags Chocolate, Flourless, Holiday, Nut-Free, Swerve
2 Comments

Flourless Thin Mint Cookies

December 13, 2013 Kate
Flourless Thin Mints

I'm so busy baking that all I have time to type is...THESE ROCK!!!!  Enjoy this nut-free treat this holiday season with no guilt when you use Swerve!!!  I suggest doubling this recipe, they are that good!!  They aren't exactly Girl Scout Thin Mints, but they are much better for you and taste amazing!!

Recipe: Flourless Thin Mint Cookies

Makes: 8-10

Ingredients

  • 1 1/2 -2 pastured egg whites (depending on egg size)
  • 1/3 -1/2 cup cocoa powder (depending on how large eggs are)
  • 1/2 – 3/4 cup granulated sweetener (I used 3/4 cup Swerve for no sugar option)
  • 1/4 tsp peppermint flavor*
  • dash of sea salt

Chocolate coating:

  • 1/2 cup dark chocolate chips (use Enjoy Life Chocolate Chips or Chunks for dairy free option)
  • 1/8 tsp peppermint flavor

Instructions

  1. Whisk the egg whites, stir in the cocoa powder, sugar and 1/4 tsp peppermint extract and salt.  The batter should be brownie batter like consistency.  Add more cocoa or sweetener if it needs to be thicker.
  2. Spoon out about 2 tablespoons worth of batter onto parchment lined cookie sheet.  The batter will spread just slightly when baked, so spoon and swirl the batter into desired cookie size.
  3. Bake at 350 for 12-14 minutes.
  4. Let the cookies cool and harden for a few minutes before you try to remove them from the parchment.  Place cookies in the frig or freezer to harden up and cool off before coating in chocolate.

Chocolate Coating:

  1. Melt the chocolate chips and peppermint flavor in a double broiler (glass bowl over a pot of boiling water).
  2. Dip each cookie in the melted chocolate, use a fork to toss and turn the cookie until fully coated
  3. Store in the refrigerator in an airtight container

Notes:  *I used Simply Organic Peppermint Flavor in this recipe.  Other brands of mint or peppermint extracts may not be as strong and you may need to use more to taste.

Enjoy!

KATE-SIGNATURE small.png
Affiliate Banners_Generic_728x90-1.jpg
In Recipes, Desserts3 Tags Chocolate, Cookies, Flourless, Holiday, Nut-Free, Swerve
19 Comments

"Rice" and Bacon Stuffed Pumpkin

November 14, 2013 Kate
Rice Stuffed Pumpkin2

Here's a fantastic and fun recipe to add to your Thanksgiving menu.  I originally had this dish with rice in place of cauliflower a couple years ago and loved it!!!  I figured I could recreate this to be grain free by using cauliflower rice.  My inspiration came from this recipe, Pumpkin Stuffed With Everything Good.  It was made with bread crumbs, but along the way it has been changed to rice (I include how to do that variation below).  I made my own additions and changes as well.  I had to make some adjustments after trying to cook the cauliflower in the pumpkin. I decided it gets way too much moisture (which is perfect for cooking rice), so it needed to be cooked in a casserole dish.  Also, through trial and error, I decided that sauteing the onions and mushrooms in the bacon grease added some additional flavor.  You certainly can leave the entire pumpkin part out (unless you are using rice), but it makes for such a great fall presentation!Instructions

Recipe: “Rice” Stuffed Pumpkin

Ingredients

  • 1 medium sized pumpkin, about 3 pounds
  • 1 medium head of cauliflower, riced (run though a food processor)
  • 4 pieces of bacon, cut into 1/2 inch pieces
  • 1 1/2 cups mushrooms, chopped
  • 3/4 cup sliced green onion, greens and whites (about 4 onions)
  • 1/4 cup unsweetened vanilla non-dairy milk
  • 2 tbsp grass-fed butter, melted (optional, see variation below)
  • 2-3 garlic cloves, minced
  • 1 tbsp fresh thyme, chopped
  • 1/2 tsp sea salt
  • 1/8-1/4 tsp nutmeg
  • Pepper to taste

Instructions

  1. Place the riced cauliflower in a large mixing bowl and set aside
  2. Cook bacon in a skillet until crispy, remove from grease and add to the cauliflower. Pour out all but 2 tablespoons of grease.
  3. Place the onions and mushrooms in the skillet of grease and saute over medium heat until the onion is translucent and mushrooms are tender
  4. Add the onion and mushroom mixture, garlic, butter, milk, thyme, salt, pepper and nutmeg to the cauliflower and mix well
  5. Place the mixture in a casserole dish and cover
  6. Bake at 350 for an hour
  7. While the cauliflower is baking, cut off the top of the pumpkin and remove the seeds and guts
  8. Once the cauliflower is done, spoon it into the pumpkin and place it on a cookie sheet. Return it to the oven with the lid on for another 15-30 minutes (make sure the oven shelf is low enough so the stem isn’t touching the burner).
  9. Remove the top after 15 minutes and remove from oven if cauliflower is done or cook another 15 minutes with lid off until done.
  10. Serve hot in the pumpkin

Variations

Butter makes everything better! You could substitute it with ghee as a dairy free option or increase the milk to 1/3 cup from 1/4 cup.

The original recipe calls for bread crumbs or rice. To make this with rice, sub the cauliflower with 2 cups of uncooked rice, use 1/3 cup milk and cook the entire dish inside the pumpkin from the start for 60-90 minutes with lid on.  Remove lid the last 15-30 minutes and cook until rice is done (Directions in link above for original recipe).


Holiday baking season is here!!  My favorite place to order all of my nut flours, nuts, chocolate, dried fruit, etc is www.nuts.com.  They have every kind of nut flour out there that is finely ground and sure to make your grain free baked goods perfect! They are certified gluten free so there is absolutely no cross contamination!!


Baking wouldn't be the same without a sweetener, but I prefer to use a sweetener that won't raise insulin levels, is natural, won't upset your belly and won't leave you feeling guilty!  Swerve is my go to...and you can enjoy 10% off as one of my readers with coupon code KATE10!

Kate's Healthy Cupboard - Gluten Free Recipes
In Side Dishes, Vegetables, Recipes Tags Bacon, Low Carb, Nut-Free, Paleo
1 Comment

Chocolate Coconut Sport Gummies

October 15, 2013 Kate
Chocolate Coconut Sport Jellies

I was recently listening to my favorite podcast, Ben Greenfield Fitness (one of the best out there, love those guys) and he was talking about fueling for races and made some comment about a high fat gummy for fuel.  It got me thinking that I could create one myself that could be stuffed away in a ziploc for use on a long training day.  You don't have to be an athlete to enjoy these, you can just call this coconut jello and enjoy it as a high fat treat!! I'm sure some of you athletes out there know what Clif Blocks are...gummy blocks full of sugar that are meant to be consumed during a race.  Some people need substance rather than a liquid, so these work great, but it's all sugar!  More and more athletes are turning to a high fat, low carb lifestyle and are doing away with the gels, gu's and other simple sugars as fuel during races and longer training sessions.  The purpose of this is to tap into your bodies fat stores for energy rather than being a sugar burner.  These gummies are a perfect source of fat for quick energy and you get some protein (amino acids) from the gelatin as well!  The triathlon and marathon season is coming to a close, but these would be good for those looking for a convenient way to fuel your workouts or to tie you over between meals.

I am a huge fan of gelatin, I actually use it daily in hot bone broth, soups or just in hot water.  It is beneficial for the gut, joints, skin and much more!!  Wellness Mama has a great post about its benefits and all of the ways to use it.  I recommend Great Lake's Gelatin (Natural Grocer's sells it) or Upgraded Self Collagen from The Bulletproof Exec website.

I also love using MCT oil (Medium-Chained-Triglycerides, also found in coconut oil and are different than Long-chained-triglycerides found in oil olive and other fats). MCT's are absorbed more like carbohydrates and are used and burned quickly by the body and not stored in the fat cells and any extra are converted into ketones.  Sounds like the perfect fat for fueling your long runs, bike rides or whatever activity you choose!  MCT oil is tasteless and stays in liquid form, so it is perfect for salad dressings or to drizzle on any dish for added fat.  You can certainly leave this out of the recipe, but it's what provides the fat along with the coconut milk that will be your fuel!  Don't get crazy and start dumping MCT oil on all your meals right away, it can cause intestinal issues for some people that are not used to large amounts of fat.  I actually didn't have any issues with it and add it to my morning smoothie every day.  I use Dave Asprey's MCT Oil or I'd suggest Now Foods MCT Oil that can be found at some health food stores in the supplement department or from Amazon.

I have not taken these out on a run (I typically don't eat anything), but please let me know if they survive the heat and how they worked for you!!

Chocolate Coconut Gummies

Ingredients

  • 1 can full-fat coconut milk
  • 3 tbsp gelatin (from grass-fed source, see above for sources)
  • 1 tbsp or more MCT oil (optional, see above for sources)
  • 1/4 tsp vanilla bean powder or 1 tsp vanilla extract
  • 2-3 tsp cacao powder (these are also good without, but cacao adds flavor and antioxidants)
  • couple sprinkles of sea salt
  • Stevia or other sweetener to taste (I used a tbsp of Swerve for no sugar option)

Instructions

  1. Place all ingredients in a blender and mix until well combined
  2. Pour into a candy mold or glass dish (size depends on how thick you want the gummies to be) and refrigerate until firm
  3. Cut into desired size and store in the refrigerator

Notes

You can tailor these to your liking by adding more cacao or none at all or try using different extracts or flavorings.

xo,

In Recipes, Desserts3 Tags Chocolate, Coconut Milk, Dairy Free, Gelatin, MCT Oil, Nut-Free
18 Comments

Flourless Double Chocolate Chip Cookies

September 17, 2013 Kate
Flourless Double Chocolate Cookie Recipe

These rock!!!  So easy, so scrumptious and low sugar when you use Swerve...my favorite natural sugar alternative!  The final product is a dense cookie with a bit of a crunch.  Your chocolate craving and sweet tooth will definitely be cured!

This cookie recipe is perfect for those of you that are nut-free and there's a dairy free option.  This sparked another idea for a flourless cookie recipe...stayed tuned, especially if you aren't a chocolate person!ned cookie sheets, it should spread out some.  I used the spoon to spread to desired size.

Makes 8 large cookies or 12 small cookies

Recipe: Flourless Double Chocolate Chip Cookies

Ingredients

  • 1-2 egg whites (I used 2 pastured eggs from Tropical Traditionswhich can be smaller in size)
  • 1/3 cup cocoa/cacao powder
  • 3/4 cup granulated sweetener ( I used almost all  Confectioner’s Swerve with a bit of coconut palm sugar)*
  • 2 tsp vanilla extract
  • dash of sea salt
  • 1/2 cup dark chocolate chips**

Instructions

  1. Beat whites (start with one) and vanilla for a few seconds until bubbly
  2. Add in cocoa powder, sugar and salt, beat until combined. Batter should be like a thick brownie batter consistency. If it seems too runny, add some more cocoa or sugar. If it seems too thick, add a bit more egg white. You really can’t mess these up!
  3. Fold in the chocolate chips
  4. Spoon batter onto parchment lined cookie sheets, it should spread out some.  I used the spoon to spread to desired size.
  5. Bake at 350 for 12-14 minutes until centers looks done
  6. Let cool on the cookie sheet. Warm cookies will not come off parchment paper cleanly

Variations

*I made these with granulated Swerve and with Confectioner’s Swerveand both tasted great!  The batter will seem gritty if you don’t “powder” your sugar, but the end result will be great!!

**Use Enjoy Life’s Dairy Free Chocolate Chips or Chunks for a Dairy Free option.

If you want to try Swerve or need to order more, use coupon code KATE10 for a 10% discount.  Swerve is my favorite sugar replacement.  It is the only sugar alcohol that will not cause tummy troubles and it does not raise blood glucose levels.

If you are an Amazon shopper, would you be so kind to use my affiliate link to make your purchases.  It is at no cost to you, it does provide a tiny kickback to Kate’s Healthy Cupboard.  This allows me to continue making and testing recipes for free.  Thanks so much!!

*I have recently switched all of my skincare and makeup to a company that is free of 1,500 chemicals!!  I am so particular about what goes into my body, I need to be just as picky as to what goes on my body!  Your skin is your largest organ and absorbs chemicals into the bloodstream faster than the gut does!  I am vain when it comes to my skin and was so thrilled to find products that are anti-aging and work!!!  Check out BeautyCounter for more info!!  You will love it!!

Kate's Healthy Cupboard - Gluten Free Recipes
In Recipes, Desserts3 Tags Chocolate, Cookies, Dairy Free, Flourless, Nut-Free, Swerve
9 Comments
Older Posts →
download.jpeg

Welcome to Kate's Healthy Cupboard! A place for healthy, grain free recipes, some low carb recipes, safe beauty and products for the home  and more...


>>  CONNECT WITH KATE  <<

pinterest.png
facebook.png
instagram.png

>>  SUBSCRIBE  <<

Success! Now check your email to confirm your subscription.

There was an error submitting your subscription. Please try again.


>>  SEARCH RECIPES  <<


Copyright 2016 Kate's Healthy Cupboard  ||  Website Design