Unfortunately, I can not say I have even tried these cheese crackers...but have been told by many that they are awesome!!! I decided to experiment with some left over cheese and make them for my boyfriend recently...they didn't last long! I can't do dairy (I wish so badly I could), but know a lot of my followers can so I wanted to share this with you! If you can't tolerate dairy, you can try these Dairy Free "Cheez-its" Crackers that I made with nutritional yeast for the cheesy flavor. Twice I have been told they are like Better Cheddars and so good!! Feel free to play around with different cheeses, I have used Cheddar and White Cheddar and they both were eaten quickly.
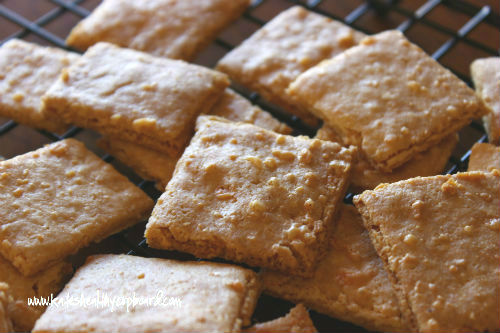
I normally make crackers with almond flour or other nut meals as the main ingredient. Cheese adds more fat and therefore more crunch without browning them a bit. Nut flour crackers are typically better slightly brown. These cheese crackers do not need to get brown to crisp up. If you let them get brown, they will taste a tad bit burnt...some people love that taste!! I'd watch these carefully towards the end of the cook time and possibly take out the edge pieces that will cook faster!
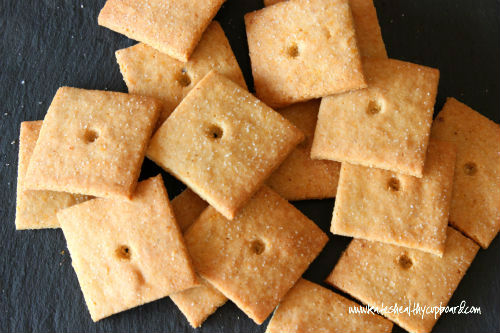
Grain Free Cheddar Cheese Crackers
Ingredients
- 1 1/2 cups shredded cheddar cheese, not packed*
- 1 1/4 cup almond flour (Bob's Red Mill or other coarse flour will work just fine)
- 1 egg
- 1 tbsp butter, melted
- 1/2 tsp sea salt plus more to sprinkle over the top of crackers
Instructions
- Place all of the ingredients in a food processor and combine until dough forms. Stirring in a bowl should work too, just whisk the egg before you add it in.
- Place dough ball onto a piece of parchment with another piece placed over top
- Press the dough down a bit with hand. Use a rolling pin to roll it out to about 1/4 inch or less in thickness.
- Remove the top piece of parchment and cut the crackers into desired size. A pizza cutter works great for this. Sprinkle with a bit more sea salt
- Place the parchment lined crackers on a baking sheet and bake at 350 for 20-25 minutes
- Do not let these start to brown unless you like the taste of slightly burnt cheese.
Notes
*I have used cheddar and white cheddar in this recipe, but any cheese should work!!
I have recently switched all of my skincare and makeup to a company that is free of 1,500 chemicals!! I am so particular about what goes into my body, I need to be just as picky as to what goes on my body! Your skin is your largest organ and absorbs chemicals into the bloodstream faster than the gut does! I am vain when it comes to my skin and was so thrilled to find products that are anti-aging and work!!! Check out BeautyCounter for more info!! You will love it!! Give the gift of health this holiday season, gift sets available!
If you are an Amazon shopper, would you be so kind to use my affiliate link to make your purchases. It is at no cost to you, it does provide a tiny kickback to Kate’s Healthy Cupboard. This allows me to continue making and testing recipes for free. Thanks so much!!