• Blog
  • Recipes
  • Lifestyle
  • Safer Skincare
  • About
  • Contact
Menu

Kate's Healthy Cupboard

Street Address
City, State, Zip
Phone Number
Healthy Lifestyle, Healthy Grain Free Recipes

Your Custom Text Here

Kate's Healthy Cupboard

  • Blog
  • Recipes
  • Lifestyle
  • Safer Skincare
  • About
  • Contact

Olive Garlic Meatballs

August 21, 2013 Kate
Olive and Garlic Meatballs

This may seem like a random recipe, but it's actually a similar recipe my mom made for us as kids.  It was one of my favorites...who doesn't like melted butter poured over food!  My moms recipe was made with flank steak or London broil placed under the broiler and sliced into thin pieces.  The olives were in the butter garlic sauce that you drizzled over the meat.  I thought meatballs would be a fun way to try to recreate this recipe.  They were a HUGE hit!  Tom, my boyfriend is not a huge green olive fan, but loooved these.  He also took some leftovers to his grandmother and she ate them all...she's 94 and doesn't seem to be eating huge portions, but she sure did enjoy a big helping!!  I hope you and your family enjoy this savory dish as much as we did!  These also work great as leftovers!

Olive Garlic Meatballs

Ingredients

  • 1 lb grass-fed ground beef
  • 1 cup green olives, diced*
  • 2 cloves of garlic, minced
  • 1/2 cup grass-fed butter (1 stick)
  • 1/4 tsp garlic powder
  • 1/4-1/2 tsp sea salt

Instructions

  1. Place the beef, minced garlic and olives in a bowl and mash together
  2. Form the mixture into balls and place on a greased baking dish with sides
  3. Bake at 400 for 16-18 minutes
  4. When the meatballs have a few minutes left to bake, place the butter in a skillet over medium heat
  5. Once the butter has melted, add in the garlic powder and sea salt and turn down to low or remove from heat
  6. Remove the meatballs and toss them into the butter mixture, coat each one well
  7. Serve with the excess butter mix drizzled over top

Quick notes

*I used olives from the olive bar that had pimentos in them. Any green olive from the bar will work.

Variations

You could try replacing the butter with olive oil, but everything is always better with butter!

Kate's Healthy Cupboard - Gluten Free Recipes
In Entrees Tags Beef, Low Carb, Meatballs, Primal
3 Comments

Cashew "Alfredo" Sauce (Guest Post)

March 5, 2013 Kate
Alfredo Sauce
Alfredo Sauce

Last weekend I had the opportunity to meet Ann from The Paleo Network.  She and her husband are triathletes that have gone grain and dairy free and are reaping the benefits!  They were featured on our local news  a few weeks back to tell their story.  We had a great time chatting about food, of course we did, we both love to be in the kitchen!

Today I am sharing a recipe with you for her Cashew Alfredo Sauce that she happened to mention to me. I decided I had to make this since it sounded so good!!!  It is such a versatile sauce and could be used in so many ways!  I was craving mushrooms today so I sauteed mushrooms and grass-fed ground beef together and drizzled...ok drenched it with the sauce!  Yum!!!  Ann uses it in a number of ways that she shares with you today!

The only thing I did differently was that I sauteed the garlic in coconut oil (or you could use butter) and then added it to the oil to add to the cashew sauce.  I don't like to use olive oil with high heat is the reason for this.

Paleo Sausage & Veggie Pizza
Lasagna Baked
Lasagna Baked

Hello to all of you! A big thank you to Kate for giving me the opportunity to write this post. A little background on the recipe I’m sharing with you today. I grew up in the Midwest eating creamy casseroles and decadent comfort foods. My favorite Italian dish (and maybe my favorite dish all together) while growing up was Fettuccine Alfredo. Since going Paleo, I no longer eat dairy or grains. What does this Midwest girl do? I learned you could make creamy sauces out of cashews. I knew nutritional yeast added a "cheesy" flavor.  Traditional alfredo sauce typically has garlic in it.  So I threw ingredientstogether into my Vitamix blender and tested it out on some spaghetti squash and zucchini “noodles”. Perfection! Since then, I’ve used it as part of my Paleo Lasagna and on Paleo Pizza (drizzled on top of the meat and veggies). I’ve also mixed it into cauliflower rice, roasted Brussels sprouts and shredded chicken. It also tastes great in omelettes (serves as a glue to hold it together) or atop egg muffins.

Cashew “Alfredo” Sauce

Ingredients

  • 2 cups raw cashews, soaked in water for at least 6 hours
  • 8 garlic cloves, minced
  • ¼ cup olive oil
  • ½ cup nutritional yeast
  • 2 t. sea salt

Instructions

  1. Drain and rinse your raw cashews.
  2. Add the cashews to your blender (I use my Vitamix ) and enough cold water to cover the cashews. Blend until creamy and smooth.
  3. Saute minced garlic in the olive oil in a small frying pan over medium heat for 1-2 minutes, or until slightly golden.
  4. Add oil and garlic to the cashew sauce along with the sea salt and nutritional yeast. Blend again until incorporated and smooth.
  5. Add additional water, if necessary.

Variations

You could probably add a little fresh basil (either to the blender or as a garnish). Roasted red peppers (pureed into the sauce) could also be a nice touch.


Let us know what you drizzle or pour this Alfredo sauce over!!!

Kate's Healthy Cupboard - Gluten Free Recipes
In Dips and Spreads, Entrees, Recipes Tags Cashews, Dairy Free, Nutritional Yeast, Paleo, Primal
3 Comments

Italian Stuffed Spaghetti Squash

January 29, 2013 Kate
Italian Spaghetti Squash

I am all about easy dinner and lunch ideas, simplicity.  I have learned that I do best with simple ingredients and honestly could eat the same thing same over and over again for my meals.  My passion truly lies in baking and sweet treats...as if you haven't noticed!!  I do try to give my readers ideas for dinners that are satisfying and most importantly taste good.  So often I am asked for meal ideas and that is one of the main reasons I created this site.

This Italian Stuffed Spaghetti Squash Recipe is a fairly easy idea full of flavor!  The stuffing is the recipe I use for my lasagne (recipe below) with the addition of ricotta, mozzarella and yellow squash (or rice noodles if you eat rice).   I can't eat dairy, but this is awesome without the cheese and I use thin slices of yellow squash as the noodles.  I added grated parmesan cheese to the top of one squash for the dairy eating crowd and left one cheeseless.

Italian Stuffed Spaghetti Squash

Ingredients

  • 1 large spaghetti squash
  • 1 lb Italian sausage
  • 1/2 lb grass-fed ground beef
  • 1/2 cup onion, chopped
  • 2 cloves garlic, minced
  • 1 tsp sea salt
  • 1 1/2 tsp dried basil
  • 1/2 tsp fennel seeds
  • 1/4 tsp ground pepper
  • 1/8 cup fresh parsley, minced
  • 1 can (28oz) plum tomatoes
  • 3 cans tomato paste
  • 1/2 cup water
  • parmesan or mozzarella cheese (optional)

Instructions

  1. With a fork, poke holes in the spaghetti squash so it can “breath” and bake at 350 for 45-60 minutes depending on the size of squash
  2. While squash is cooking, saute the sausage over medium high heat in a large sauce pan, about 3-4 minutes
  3. Add the beef, onion and garlic until brown. Drain the grease
  4. Add the salt, basil, fennel, pepper and parsley
  5. Place the tomatoes in a bowl and mash.  Add the paste and water to the tomatoes and pour mixture into the meat
  6. Simmer and cover until squash is done cooking
  7. Remove Squash once it is easy to pierce with a fork and cut it into two halves lengthwise
  8. Scrape out the seeds and fill each side with the meat
  9. Top with cheese and place under the broiler for the cheese to melt and brown (optional)
  10. Scrape the squash to form spaghetti and enjoy!!!

Variations

To make lasagne, follow all of the directions above for the sauce and let simmer covered for 1 1/2 hours.  In a small bowl, combine 2 cups ricotta cheese, 3 eggs (beaten) and an additional 1/8 cup of fresh parsley.  Place a layer of noodles or squash on the bottom of a greased 9×13 dish.  Cover with 1 1/2 cups of sauce, half of the ricotta mixture, 1/4 cup parmesan and 1/2 of the mozzarella (half of a 3/4lb bag).  Repeat layering ending with sauce and sprinkle with remaining cheese.  Bake at 350 covered for 25 minutes, remove cover and bake an additional 20 minutes.

Kate's Healthy Cupboard - Gluten Free Recipes
In Entrees, Recipes Tags Beef, Dairy Free, Nut-Free, Paleo, Primal, Sausage
Comment

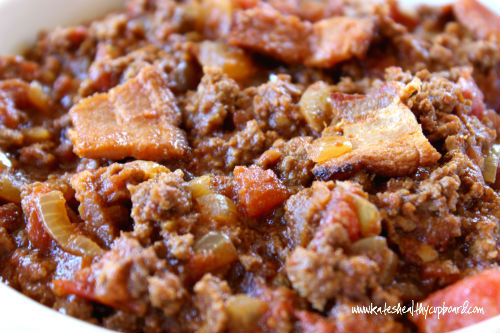
Bacon Chili

January 16, 2013 Kate
Basic Chili
Basic Chili

What!!!  No beans in your chili?  Yep, no beans.  I have chosen to not eat beans and legumes for a couple of reasons.  For one, I don't eat much starch anymore, I have chosen a high fat eating plan.  Second, beans and legumes contain considerable amounts of phytates — anti-nutrients which bind to minerals in the legumes, making them unavailable to our bodies. (This means some of the minerals present in the legumes aren’t able to be accessed by our bodies).  Nuts also have some phytates, but I feel the beneficial fats far exceed any of the nutrients in beans and legumes.  With all of that said, please feel free to add beans to this recipe.

I remember as a kid I never really cared for chili, unless it was canned with meat and beans only.  I think too many chili's have too many tomatoes that over power the taste.  I just don't like biting into a spoonful of mushy tomatoes personally.  I did put tomatoes in this recipes, but next time may make it with even less.  Some of you may want even more and love the mushiness and flavor they add.

Bacon Chili

Ingredients

  • 1 lb grass-fed ground beef
  • 4 slices bacon
  • 1 onion, chopped
  • 1/2 red bell pepper, seeded and cut into 1/2 inch pieces (optional)
  • 3 garlic cloves, minced
  • 1/8 cup chili powder
  • 1/2 tbsp ground cumin
  • 1 tsp ground coriander
  • 1/2 tsp red pepper flakes
  • 1/2 tsp dried oregano
  • 1/4 tsp cayenne pepper
  • 1 (28oz) can diced tomatoes
  • 1/2 tsp sea salt (or more if tomatoes don’t have added salt)

Instructions

  1. Slice the bacon into 1/2 inch pieces and place in a large saucepan over medium heat
  2. Once the bacon is cooked though, pour off all but 2 tablespoons of the bacon grease and return pan to the heat with the bacon in it
  3. Add the onions, peppers, garlic and all of the spices except the salt and cook until the onions get tender and start to brown, about 10 minutes
  4. Increase the heat to medium high and add the beef, breaking it up into pieces with a spoon until no longer pink, about 3-4 minutes
  5. Add the tomatoes and salt and bring to a boil, then reduce heat to a simmer. Cover, stir occasionally and cook for about an hour
  6. Remove lid and let the chili cook for an additional hour to thicken up
  7. Add salt to taste

This is great without, but you could top with cheese if you can tolerate it!!  This is the perfect make ahead meal or double it to freeze for later!

If you are an Amazon shopper, would you be so kind to use my affiliate link to make your purchases.  It is at no cost to you, it does provide a tiny kickback to Kate’s Healthy Cupboard.  This allows me to continue making and testing recipes for free.  Thanks so much!!

*I have recently switched all of my skincare and makeup to a company that is free of 1,500 chemicals!!  I am so particular about what goes into my body, I need to be just as picky as to what goes on my body!  Your skin is your largest organ and absorbs chemicals into the bloodstream faster than the gut does!  I am vain when it comes to my skin and was so thrilled to find products that are anti-aging and work!!!  Check out BeautyCounter for more info!!  You will love it!!  Give the gift of safe skincare this holiday season, gift sets available.

Kate's Healthy Cupboard - Gluten Free Recipes
In Entrees, Soups, Recipes Tags Bacon, Beef, Dairy Free, Egg-Free, Low Carb, Nut-Free, Paleo, Primal
13 Comments

Creamy Roasted Cauliflower and Mushroom Soup

January 10, 2013 Kate
Creamy Roasted Cauliflower and Mushroom Soup

It seems that most of the west is about to experience a bit of a cold front.  I thought this would be the perfect time to share this recipe!  I'm fortunate enough to still be in Arizona where a cold front means it's going to be in the 50's!  I live in Colorado, so listening to the weather forecast here cracks me up!!  What these people think is cold is definitely a hot winter day at home!

Even if it's not cold where you are, this is a delicious soup recipe to enjoy for lunch or dinner.  I served it with bacon pieces and used the bacon grease for flavor.  If you'd prefer, you can certainly skip the bacon, but who skips bacon?  This would also be good with shredded chicken as well.

Creamy Roasted Cauliflower and Mushroom Soup

Ingredients

  • 1 head of cauliflower, cut into pieces
  • 2 tbsp coconut oil
  • 2-3 pieces of bacon (optional)
  • 2 tbsp bacon grease, butter or coconut oil
  • 1/4-1/2cup white onion, diced
  • 2 garlic cloves, minced
  • 1 tsp fresh thyme or 3 tsp dried
  • 8 oz mushrooms, sliced
  • 1/4 cup white wine
  • 3 cups homemade chicken broth (or canned)
  • 3/4 cup full fat coconut milk
  • 2 tbsp grass-fed butter (optional)
  • sea salt and pepper

Instructions

  1. Place the pieces of cauliflower in a bowl and coat with the 2 tablespoons of coconut oil. Place single layer on a parchment lined cookie sheet and sprinkle with salt and pepper and roast at 400 for 25-30 minutes
  2. Cook the bacon in a skillet, reserve the grease, cut the bacon into pieces and set aside
  3. Place the bacon grease, coconut oil or butter in a large sauce pan with the onion. Saute the onions until slightly browned
  4. Add the garlic, thyme and mushrooms. Saute until the mushrooms are tender, about 5-10 minutes
  5. Add the white wine and de-glaze the pan
  6. Add the chicken broth and cauliflower and bring to a boil. Reduce heat to a simmer for 5 minutes
  7. Place the soup, coconut milk and optional butter in a food processor or blender and combine until desired consistency
  8. Salt and pepper to taste
  9. Sprinkle the bacon pieces on top (optional)

I served this tonight and when I told Tom what I had made, this was his response: "If I saw that on the label ofa soup can, I would not think it sounded very good."  About two bites into it, he kept telling me how awesome it was!  I knew he was going to like it!  Butter, bacon and mushrooms, who wouldn't love this!!

Kate's Healthy Cupboard - Gluten Free Recipes
In Entrees, Side Dishes, Soups, Vegetables, Recipes, Snacks and Appetizers3 Tags Bacon, Coconut Milk, Dairy Free, Egg-Free, Low Carb, Mushrooms, Nut-Free, Paleo, Primal
4 Comments

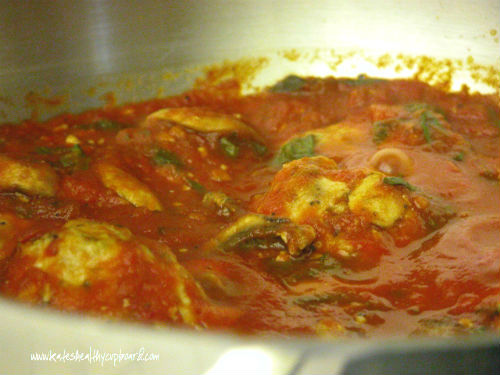
Roasted Tomato Basil Meatballs

January 6, 2013 Kate
Tomato Basil Chicken Meatballs

Happy New Year to you all!!  Sorry I have been MIA lately.  My boyfriend had knee surgery before the holidays and it's been a bit crazy around here!

I wish I could come out with a bang to start the year off, but to me, baked goods are the way to do that and I am taking a break from those for a bit!  Don't worry, chocolate will be back in my ingredient lists soon, Valentine's Day is right around the corner!!!

This picture doesn't really do this justice, but it's the best I could do with the lighting, dishes and old camera I had.  I recently made this again with ground beef instead of ground chicken that I used in the original recipe.  I really liked both of them, you can't go wrong.

Most meatloaf and meatball recipes use breadcrumbs to hold it together.  I use mushrooms chopped up into little pieces to create the same effect, and they add some flavor.  I love mushrooms and can't believe I wouldn't touch them until a few years ago.  I can eat an entire 8 ounce container myself and always wish I had more!  It's so easy to saute them with butter and garlic and then do a white wine or sake reduction.  YUM!!!

This recipe also called for roasting your own tomatoes for the sauce.  Feel free to buy fire roasted tomatoes in the can if you don't have the time to do this.  I think the oven roasted tomatoes give it more flavor, but either way, this is delicious.  We just eat this plain, we're simple like that, but feel free to serve over spaghetti squash.

Adapted from One Lovely Life's Basil Chicken Meatballs in Roasted Tomato Basil Sauce


Roasted Tomato Basil Meatballs

Ingredients

Meatballs:

  • 1 lb ground meat (I’ve used chicken and beef, both are good!)
  • 1 egg, lightly beaten
  • 1/2 cup chopped mushrooms (use mushrooms that will be used in sauce)
  • 2-3 tbsp fresh basil, minced
  • 1 tsp fennel seeds
  • 1 tsp dried oregano
  • 1/2 tsp sea salt
  • 1/4 tsp black pepper
  • 1/4 tsp garlic powder

Sauce:

  • 2 cartons of grape tomatoes or 4 large tomatoes on the vine (or large can of fire roasted tomatoes)
  • 1 tbsp olive oil
  • 1 tbsp balsamic vinegar
  • 1 tbsp oregano
  • 1 8oz can of tomato sauce
  • 8oz sliced mushrooms (1/2 cup used in meatballs)
  • 1/3 cup fresh basil, minced
  • 1 garlic clove
  • salt and pepper to taste

Instructions

Roasted Tomatoes:

  1. Chop tomatoes into pieces and place single layer on a parchment lined cookie sheet
  2. Drizzle with the oil and vinegar. Sprinkle with the oregano and salt and pepper
  3. Roast at 375 for 45-60 minutes

Meatballs:

  1. In a bowl, combine the meat, egg, mushrooms, basil, fennel, oregano, salt, pepper and garlic powder.
  2. Form into one inch meatballs, about 20-25
  3. Place on a parchment lined cookie sheet and bake at 400 for 15-20 minutes or until just browned

Sauce:

  1. While meatballs are cooking, pulse the roasted tomatoes, tomato sauce and garlic clove until desired consistency
  2. Pour mixture into a large saucepan and bring to a simmer over medium low heat.
  3. Add the mushrooms and cook until tender, about 5-8 minutes.
  4. Stir in basil and add salt and pepper or more basil to taste.
  5. If sauce is thicker than you’d like, add a bit of water
  6. Once meatballs have finished cooking, add them to the sauce and toss until coated.
  7. Serve hot over spaghetti squash or enjoy plain topped with mozzarella if you can tolerate dairy
Kate's Healthy Cupboard - Gluten Free Recipes
In Entrees, Recipes Tags Chicken, Low Carb, Meatballs, Mushrooms, Nut-Free, Paleo, Primal
Comment

Bacon Wrapped Scallops

November 8, 2012 Kate
Bacon Wrapped Scallops

So let's be honest, what isn't delicious when it's wrapped in bacon...can't think of anything!!  I don't eat it that often, but when I do, I savor every last bite.  I am not worried about bacon fat, or really any healthy fat for that matter.  As long as your bacon is from a hormone free source and not full of sugar, treat yourself to it here and there!  I get mine from a local butcher, but I highly recommend US Wellness Meats for their bacon and all things meat!  Trusted family farm raising animals right!!

This is such an easy recipe and may remind you of a popular appetizer that calls for water chest nuts wrapped in bacon.  This is just as good, but lacks the crunch of the chestnut, so feel free to add them to each bite as well.  I used bay scallops, it's what I had, but diver scallops cut in half will work just fine.  You may need a bigger piece of bacon for the diver scallops halves or if you are adding a water chest nut.

Bacon Wrapped Scallops

Ingredients

  • 1 lb bay scallops (or diver scallops cut in half)
  • 8-10 pieces of bacon
  • 1/2-2/3 cup Coconut Aminos (found online or Asian aisle of natural grocery stores)
    (Gluten Free Soy alternative)
  • can of water chest nuts (optional)
  • tooth picks or bamboo skewers

Instructions

  1. Marinate the scallops (and water chestnuts) in the Coconut Aminosfor at least an hour
  2. Cut the bacon into half or thirds depending on what scallops you are using or if you are adding chestnuts
  3. Wrap the bacon around the scallop and hold it together with a toothpick or skewer
  4. Place the wrapped scallops on a broiler pan. If you don’t have one, a cooling rack placed on a cookie sheet that is lined with foil works great too
  5. Broil for 3-4 minutes on each side. Watch these so they don’t burn
  6. Serve hot and crispy!
Kate's Healthy Cupboard - Gluten Free Recipes
In Entrees, Recipes, Snacks and Appetizers2 Tags Bacon, Low Carb, Paleo, Primal, Seafood
2 Comments

Cashew Chicken

October 22, 2012 Kate
Cashew Chicken
Cashew Chicken

I am starting to wonder why it took me so long to start cooking with a crockpot!  It can make meals so quick, easy and ready for you when you arrive home from a long day.  Plus, it's fantastic for making bone broth!  I was inspired to make this cashew chicken by this recipe that I found on Pinterest, but made quite a few changes to remove the sugars, gluten and a few other things.  Speaking of Pinterst, if you are on there and addicted like me, come follow me.  Although this recipe was done in a crock pot, I think you could probably make this on the stove or in the oven as well. Let me know if any of you try this!  I just don't think you can go wrong when cashews are involved!

Recipe: Cashew Chicken

Ingredients

  • 1/2 tsp fresh ginger, grated (A Microplane is my favorite for this and zesting)
  • 1/4-1/2 tsp red pepper flakes
  • 1/2 cup cashews

Instructions

  1. Add the chicken pieces and onion to the crockpot
  2. In a bowl, mix together all of the remaining ingredients except the cashews
  3. Pour the mixture over the chicken and mix so the chicken is coated
  4. Set temperature to low and cook for 3-4 hours
  5. Add in the cashews and serve

Quick notes

Double the sauce if you want some extra to put over vegetables.

The Cauliflower Fried "Rice" or the Cashew Bok Choy would be a great vegetable to have with this chicken dish!

Kate's Healthy Cupboard - Gluten Free Recipes
In Entrees, Recipes Tags Cashews, Chicken, Paleo, Primal
3 Comments

Chicken Noodle Soup

October 19, 2012 Kate
Chicken Noodle Soup
Chicken Noodle Soup

Yes, you are reading that correctly...noodles!!!  I am so excited about this recipe!  Not only does it have grain free noodles in it, but it has homemade broth that is full of numerous health benefits!!  Homemade broth is so easy to make, more on that later, but I wish it was available to buy frozen so more people would consume it!  Boxed broth just doesn't cut it when it comes to all the benefits, but it will work in this recipe if that's what you choose to use.

Enough about broth for now, this soup has noodles!!!!  Before you get too excited, those of you that still eat pasta, rices and breads, these will be enjoyable, but not as enjoyable as they will be to those of you that gave up gluten and rice pasta long ago!!!  I truly felt like I was eating noodles and the best part is, there's only a small amount of starch in this recipe.  My mom's chicken noodle soup was my all time favorite as a kid!  It was my birthday dinner request for years!  I remember going after more noodles than chicken and broth, so really it was her noodles that I loved!  They were thick, dense and delicious...and full of gluten!  This recipe comes pretty darn close and makes me feel like I'm getting the real thing!!

There are a couple of ingredients in this that you may be unfamiliar with.  Arrowroot Flour/Powder is the starch I use to bind and soften the noodles.  It is tasteless and often times used to thicken sauces and gravies (great alternative to cornstarch).  It comes from the rizhome plant and is pure starch, so it contains carbohydrates only.  Don't let that scare those of you that are trying to go low carb.  There is such a small amount of it in this recipe (about 21 grams total, so a little over 5 grams per serving)!  I use Bob's Red Mill Brand that can be found in the baking section of a grocery store or online.

The other ingredient is psyllium husk powder (or whole psyllium husks ground into a powder with a blender or spice grinder).  It acts as a thickener and binder as well.  It's mucilage properties (gels when liquid is added to it) sort of act as the gluten without having to use gluten.  It is a soluble fiber and often found in high amounts of things like Metamucil.  Don't worry, this will not cause intestinal distress!  There is such a small amount of it in this recipe, you won't even know it's there!!!  This is typically found in the supplement section of natural grocery stores or availableto order online.

Chicken Broth
Chicken Broth

I make chicken broth about every two weeks and drink a cup of it everyday.  It is so easy to do and like I said, so beneficial for so many things including healing your gut!!  It provides the body with easily absorbed minerals such as calcium, magnesium, phosphorus and other trace minerals.  In addition to the collagen it provides (Ladies, did you see the word collagen, it improves aging skin!  I hope you are all convinced to make your own broth now!!!), it also contains natural gelatin.

Gelatin was found to be useful in the treatment of a long list of diseases including peptic ulcers, tuberculosis, diabetes, muscle diseases, infectious diseases, jaundice and cancer. Babies had fewer digestive problems when gelatin was added to their milk. The American researcher Francis Pottenger pointed out that as gelatin is a hydrophilic colloid, which means that it attracts and holds liquids, it facilitates digestion by attracting digestive juices to food in the gut. (source: wapf.org)

I use a crockpot since I let it simmer for over 24 hours, but you can certainly use a large stock pot and leave it cooking overnight.  You want to use about 2lbs of bones for every 4 quarts of water.  Make sure your bones are from grass-fed animals (Us Wellness Meats is great source for tons of different bones and grass-fed meats)!  I use chicken feet most of the time and find them in a freezer at Whole Foods.  Ask the butcher if you can't find them.  I just love how much gelatin feet produce.  They are kind of creepy looking, but once you realize how amazing the broth is, you'll get over it!!  Add the bones and water to your pot and also add at least 2 Tbsp of Apple Cider Vinegar (organic and unfiltered) or Coconut Vinegar(vinegar provides acid and draws minerals out of the bones) along with about a tsp of sea salt.  Use more vinegar and salt if you are using more than 4 quarts of water.  I also add some garlic cloves, a carrot, celery stalk and some onion for flavor.    Allow the broth to come to a boil and then turn down the temperature to a simmer and let it simmer for at least 8 hours, the longer the better.  Once it's cooked, turn off the crockpot or remove your pot from heat and allow the broth to cool.  Strain the stock through a fine mesh metal strainer or with a spider and throw away what you skim off.  Place the cooled stock into glass jars for storage in the fridge (for up to a week) or pour into freezer-safe containers (not glass, they will break!) for later use. You can freeze it in ice cube trays and defrost a few at a time!

When the broth is fully cooled, it may have a gelatinous consistency. That means your broth is rich in gelatin!  Sometimes a longer or very hot simmer may break down the gelatin and your broth won’t appear gelatinous.  Don't worry, the minerals are still there. As you can see in my photo, there is a layer of fat on top.  If you like, you can skim off any fat that is now considered “tallow” – and feel free to cook with it! I have also heard its so good for your skin, applied topically!  I just might have to get brave and put it on my feet at night!!

Chicken Noodle Soup

Serves: 2-4

Ingredients

  • 8 cups chicken broth (homemade is best, see recipe in text above)
  • 1/2 – 1 onion, diced
  • 1 large carrot, diced
  • 1 celery stalk, diced
  • 1 clove garlic, minced (optional)
  • sprinkle of parsley for color (optional)
  • salt and pepper to taste
  • 2 chicken breasts

Noodles:

  • 1/4 cup coconut flour
  • 1/2 cup Honeyville almond flour
  • 2 tbsp psyllium husk powder (grind whole husks in blender)
  • 3 tbsp arrowroot flour
  • 2 large eggs*
  • 1/4 tsp salt
  • 1/4 tsp garlic

Instructions

  1. In a large pot, bring the broth to a boil and add the onion, carrot, celery, garlic and salt and pepper.
  2. Turn down to a simmer and add the two chicken breasts
  3. Depending on the thickness of breasts, cook the chicken completely, about 10-15 minutes
  4. Remove the chicken and once it’s cool enough to touch, chop it or shred it and return it to the simmering soup

Noodles:

  1. Whisk the eggs in a mixing bowl
  2. Add the remaining ingredients and stir until dough forms
  3. If it seems too sticky add a tiny bit more almond flour.  It its crumbly, read my comment in Quick Notes below
  4. Place a piece of parchment paper on the counter and spray it with coconut oil spray or lightly brush oil onto the paper and place dough on it
  5. Take another piece of parchment and do the same to one side and place on top of the dough.  this keeps the dough from sticking
  6. Roll out the dough to no less than 1/4 inch thick. If these are to thin, some of noodle will disintegrate. I think a bit over 1/4 inch is best
  7. With a sharp knife or pizza cutter, cut noodles into desired width and length, they will grow a bit wider once cooked
  8. Place the cut noodles in the simmering broth, cover and cook for 3-5 minutes or until desired tenderness
  9. Remove pot from heat and serve

Quick notes

*I use farm fresh eggs that tend to be a bit smaller. If your dough is crumbly after you’ve completely mixed it, you may need to add another egg or half an egg (whisk and pour just half).

Soups On!!!!

Kate's Healthy Cupboard - Gluten Free Recipes
In Entrees, Soups, Recipes Tags Almond flour, Chicken, Coconut Flour, Paleo
7 Comments

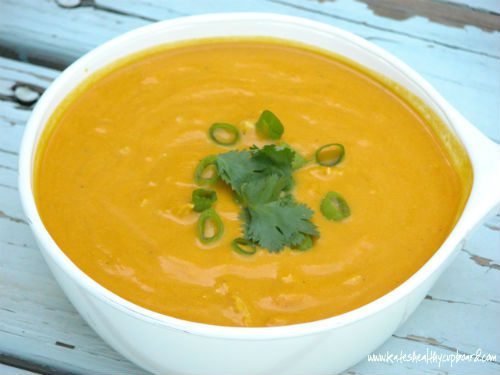
Coconut Curry Carrot Soup

October 10, 2012 Kate
Coconut Curry Carrot Soup

It's definitely soup season here in Colorado!!!  I just returned from ten days in Arizona and can't believe how cold it feels here now!  I've decided I prefer the warmth and the idea of never having to scrape ice off my windshield!

While I was in Arizona, I made this soup for Tom's (my boyfriend) grandmother.  She is 93...reminds me of Betty White, love her!!  She hasn't been feeling great and I think dehydration is playing a role in her tiredness.  Old people don't want to drink so they don't have to go potty.  She of course thinks she drinks a ton of fluids.  It's hard to convince her that her coffee with Starbuck's Ice Cream in it in the morning and her Vodka on the rocks at night just doesn't cut it!!!  Needless to say,  I was on a mission to get some fluids in her!  I had her drinking coconut water and kombucha along with some homemade bone broth.  I figured soup would be a great way to secretly increase her fluid intake.  She loooooved this soup and ate it everyday for lunch and raved about it every time I dished it up for her.  Hope you enjoy it as much as sweet Verna May did!!!

Recipe: Coconut Curry Carrot Soup

Ingredients

  • 1 tbsp grass-fed butter or coconut oil
  • 2 heaping cups of thickly sliced carrots (about 4 carrots)
  • 2 thin slices of fresh ginger root
  • 1 medium onion, chopped
  • 5 cups chicken broth (I prefer homemade*)
  • 3/4 cup full fat coconut milk
  • 3/4 tsp red curry paste (add more if you want it spicier)
  • salt and pepper to taste
  • 1 scallion, sliced
  • 1 tbsp chopped cilantro
  • 2 chicken breasts (optional)

Instructions

  1. Heat the butter/oil in a large saucepan and stir in the carrots and ginger
  2. Cook over medium heat until the carrots start to brown, about 6-8 minutes stirring constantly
  3. Add the onions and cook until they are translucent
  4. Stir in the broth, coconut milk and curry paste
  5. Bring to a boil, reduce heat and simmer covered for 25 minutes
  6. If you want to add chicken to this recipe, add it to the simmering soup. Remove chicken once it's fully cooked and set aside
  7. Strain the solids so you can remove the ginger root and discard
  8. Add the solids plus 2 cups of the liquid to a blender and puree
  9. Add the remaining liquid and process until completely pureed
  10. Pour soup back into saucepan to add shredded chicken or pour into soup bowls (Use a fork to shred the chicken once it has cooled enough to touch. Add it to the soup and stir)
  11. Serve with some scallions and cilantro sprinkled on top and additional salt and pepper if needed

Quick notes

*I prefer to use homemade chicken broth for all of the health benefits. Store bought will work, but may be higher in sodium so be careful when you salt the soup. I use this recipe for broth. I also add onion, carrots, celery and garlic cloves to my pot for flavor. I use a large crockpot and let simmer for 24 hours to let all of the gelatin out of the bones.

Kate's Healthy Cupboard - Gluten Free Recipes
In Entrees, Side Dishes, Soups, Vegetables, Recipes, Snacks and Appetizers2 Tags Chicken, Coconut Milk, Nut-Free, Paleo
Comment

Chicken With Mushroom "Cream" Sauce

September 17, 2012 Kate
Chicken with Mushroom Cream Sauce

I can't believe I have shied away from mushrooms my entire life until recently!  I know it's a fungus, but damn they are good and heck, they have medicinal properties as well.  So why not saute some in butter and garlic then finish off with some white wine!! My only complaint is that you think you are making a ton, but by the time they cook up, it's half the amount and you find yourself longing for more!!

I found a recipe similar to this, but unfortunately, it called for heavy cream and my body can not handle that.  Coconut milk was the solution as long as all of the flavors would hide the coconut taste and it would thicken up.  I have to say, this was divine!!  I could have just eaten the entire pan of the mushroom cream sauce and left the chicken for another day!

I pan fried the chicken.  This may be a bit intimidating to some and quite simple for others.  Since chicken is a fairly lower fat meat, it's easy to over cook if not fried just right.  You could simply bake the chicken and then smother it in the mushroom sauce.  The only draw back to this is that you miss out on all the sucs, as the french call it, or solids from the meat left over in the pan that add flavor to the sauce.  When liquids are added to these solids, its creates a great base for gravies and sauces.

A couple of things to remember when pan frying.  I would recommend using a stainless steel pan.  Make sure the pan is hot before you add the oil and that the oil is hot before you add your meat.  The molecules of the pan are collapsing and expanding as it heats up and if you place meat in it before it's hot enough, those molecules will grab a hold of your meat and cause it to stick.  Make sure your meat is patted dry and completely thawed out.  if not, there will be added moisture to the pan resulting in a longer cook time and over done meat.  The goal is to have a crispy golden crust without over cooking the food.  Keep in mind the thickness of the meat, thinner meats should be cooked at higher heat for a shorter time.  Longer cooking times will result in tougher dry meat.  The heat can vary on stoves, but one way to make sure the pan is at the right temp is to listen to the sizzling.  You want a gentle sizzling sound, turn the heat down if the sizzling is too intense and turn it up if it's not sizzling.  If this sounds too hard but you want a crispy outside to your chicken, you could simply pan fry each side until they are browned, then throw the meat in the oven to finish cooking.

Recipe: Chicken With Mushroom Cream Sauce

Ingredients

  • 3 tbsp grass-fed butter
  • 1 tbsp coconut oil
  • salt and pepper

Instructions

  1. Heat a large, stainless- steel pan over medium high heat
  2. Pat the breasts dry and season with salt and pepper
  3. Once the pan has reached the proper temperature, add the oil and 2 tbsp butter
  4. Place the chicken breasts in the pan and cook until golden brown. You may need to turn your heat down to medium if it's sizzling too much.
  5. Flip and continue to cook until just done. Alternatively, you could just sear the chicken and then finish in the oven at 350.
  6. Once the chicken is cooked, remove from the pan and set aside. Place a tented piece of foil loosely over the plate
  7. Do not remove any of the solids or oil/ butter from the pan. Add the shallots and cook until translucent
  8. Add the remaining tablespoon of butter and the mushrooms
  9. Once the mushrooms have browned and their moisture has evaporated, deglaze the pan with the white wine
  10. Add the chicken broth and let the sauce reduce by two-thirds then add the coconut milk
  11. Let the sauce simmer and reduce until it's a sauce like consistency
  12. Add additional salt and pepper if needed then pour it over your chicken

Let me know if I have created more mushroom lovers!

Kate's Healthy Cupboard - Gluten Free Recipes
In Entrees, Recipes Tags Chicken, Coconut Milk, Egg-Free, Low Carb, Nut-Free, Paleo, Primal
2 Comments

Spicy Sauteed Shrimp

September 4, 2012 Kate
Spicy Sauteed Shrimp

If you like shrimp, a bit of spice and a quick and easy meal, this recipe is for you!!  I am all about simple, but good when it comes to food...I may be too simple for some!  Tom has said numerous times that I'm such a good cook, I laugh every time he says that...after I tell him thank you.  I appreciate him saying that, but I really have a lot to still learn about cooking and technique.  What I am good at is sticking to the basics and learning how to add flavor to dishes.  My point is that YOU can be impressive in the kitchen, just keep it simple and spice it up!!!  As long as he likes my cooking, that's all that really matters, right?

Hope you enjoy this as much as we did!

Spicy Sauteed Shrimp

Ingredients

  • 1 lb raw shrimp, peeled and deveined
  • 2 bunches green onion, diced
  • 1-2 cloves garlic, minced
  • 1/2-1 jalapeno, seeded (unless you like it hot!) and diced
  • 1/4 – 1/2 tsp ground cumin
  • 1/2 – 1 lime, juice
  • 2 tbsp fresh cilantro, chopped
  • 1-2 tbsp coconut oil or butter
  • Red pepper flakes (optional)
  • Salt and pepper

Instructions

  1. Rinse and dry the shrimp, set aside
  2. In a large skillet, saute 1 tbsp of oil/butter with the onions, garlic and jalapeno over medium heat for about a minute.
  3. Add the shrimp, additional oil/butter if needed and cook for about 3-5 minutes until the shrimp are opaque throughout.
  4. Remove from heat, squeeze fresh lime juice over the top, sprinkle with cumin, red pepper flakes, salt and pepper and cilantro.  Stir and serve!
Kate's Healthy Cupboard - Gluten Free Recipes
In Entrees, Recipes Tags Dairy Free, Fish, Nut-Free, Paleo, Primal, Seafood
Comment

Better Butter Chicken (From Sarah Fragoso)

August 27, 2012 Kate
Better Butter Chicken

I shared this recipe link on Kate's Healthy Cupboard Facebook Page recently.  I know not everyone uses Facebook so I wanted to share it on here too.  It is such an easy recipe and one that just about everyone will enjoy! It is not my recipe, just one I tried and fell in love with!

I made this for the second time in a matter of a few weeks because it is that tasty!!  We enjoyed it plain, but I think this would be great over spaghetti squash or pasta if gluten is something you still choose to pollute your body with (sorry, I just hate the stuff and wish everyone would realize it's negative effects on the body!).  I make it a bit more saucy by reducing the amount of chicken (I use 1 1/2 lbs instead of 2 1/2) in the recipe and suggest doing that if you do plan to serve it over pasta, rice, squash or spiraled vegetable noodles.  I also use chicken breasts, not thighs, but feel free to use either one.  The recipe calls for fenugreek powder, I used fenugreek seeds and it worked just fine.  Whole Foods sells bulk seasonings if you can't find it in a bottle or if you just want to buy enough for this recipe.  My suggestion is to use grass-fed butter where it is called for instead of the coconut oil option.  I think butter makes it creamier and let's be honest, butter makes all things better!!!

You can find the recipe here from Sarah Fragoso of Everyday Paleo.  This works well to freeze and pull out as leftovers later!!

Hope you enjoy it as much as we did!

Kate's Healthy Cupboard - Gluten Free Recipes
In Entrees, Recipes Tags Chicken, Coconut Milk, Egg-Free, Low Carb, Nut-Free, Paleo
Comment

Coconut Shrimp Cakes

August 23, 2012 Kate
Coconut Shrimp Cakes

This is my version of fried coconut shrimp done in a completely different form!  These are so easy and so tasty!  I kept it really simple but there are plenty of different flavor options.  I wanted to taste the mild sweetness of the coconut without anything over shadowing that.  Some cayenne pepper would spice it up or some curry could be good as well!

Most coconut shrimp recipes involve flour or cornstarch and they also use sweetened coconut.  I chose to leave out the flour and let the coconut be the binder along with the egg.  I don't think it needs flour, but feel free to play around with almond or coconut flour.  As for the coconut, these are definitely not as sweet as coconut shrimp you find on most menus.  Again, feel free to use sweetened coconut or add a bit of a sweetener.

I enjoyed these plain, that's how I like things!  There are numerous dipping sauce recipes and sauces sold in a bottle that would be great with these.  One that comes to mind is a Mango Habanero Sauce that you can find at Whole Foods that is fantastic on grilled shrimp.  Better yet, make your own!

Coconut Shrimp Cakes

Ingredients

  • 1 1b raw shrimp, shelled and deveined
  • 3/4 – 1 cup unsweetened shredded coconut (use sweetened or add sweetener if you like it sweeter)
  • 2 egg whites
  • 1/2 tsp celtic sea salt
  • 2 tbsp virgin coconut oil for frying (virgin has coconut taste and I think that adds to the flavor here)

Instructions

  1. Cut off tails of the shrimp and place in a food processor.
  2. Pulse the shrimp until they are in tiny pieces, almost like mush.
  3. In a large bowl, whisk the egg whites.
  4. Add the shrimp, coconut and salt to the eggs and combine
  5. Form the batter into 8 patties about 1/2 inch thick
  6. Heat 1 tbsp of oil in a large skillet over medium heat
  7. Add four patties to the skillet and cook about 4-5 minutes per side
  8. Add the other tbsp of oil to the pan and cook the remaining 4 patties

Enjoy!

Kate's Healthy Cupboard - Gluten Free Recipes
In Entrees, Recipes Tags coconut, Fish, Low Carb, Nut-Free, Paleo, Seafood
Comment

Lollipop Rolls

August 20, 2012 Kate
Lollipop Rolls
Lollipop Rolls

For those of you that don't know me, I am a huge sushi fan!  Yes, I love raw fish!  I like cooked salmon, but raw salmon sashimi does not taste fishy at all, and if it does, it's old or bad quality!  I buy sushi grade salmon and tuna from Whole Foods and have never had it be bad.  They have it already portioned out in slices and pack it fresh on a regular basis.  Raw fish does not stay fresh for long, so please buy it to use that day or possibly the next.  So if you are someone that avoids sashimi because you can't stand how fishy cooked salmon is, give it a try, you might be surprised!!

One of my favorite sushi restaurants in Scottsdale that we frequent a lot, has four different lollipop rolls on their menu.  I just love how refreshing they are with the cucumber wrap and they are free of rice for all you grain free friends out there!  The roll I order consists of salmon, yellowfin tuna, crab and avocado wrapped in cucumber and served with a ponzu dipping sauce.  Being gluten and dairy free tends to mean you can not enjoy any sauces at sushi restaurants.  I love these as is with some wasabi on top, but for my lollipops I decided to dip them in my Avocado Vinaigrette.  I love the mixture of avocado and sushi so this is the perfect match!!  The other option is to eat it like a traditional roll and dip it in a mixture of wasabi and some Coconut Aminos (gluten free soy sauce alternative that tastes great!!).

I was so excited to post this recipe that I didn't want to wait any longer as I experimented with a gluten free ponzu sauce.  I will work on one, seems pretty simple.  I am also going to work on a pesto dipping sauce that many places serve with rolls as well.  These may look complicated, but really take no time at all!!!

Lollipop Rolls

Makes 12 rolls

Ingredients

  • 3/4 lb of sushi grade fish (I used salmon and tuna, but crab or shrimp will also work)
  • 1 large cucumber
  • 1/2 of an avocado, sliced into 6 strips
  • 12 bamboo skewers
  • wasabi powder

Instructions

  1. Using a mandoline, slice the cucumber lengthwise into 1/8 inch thick slices
  2. Lay out a slice of cucumber vertically. Place fish slices and a slice of avocado horizontally across the cucumber. Set all of them right next to each other. You may need to trim off and pieces that are hanging over the edge of the cucumber
  3. Roll the cucumber tightly until it overlaps itself.
  4. At the overlap spot, poke a bamboo skewer into each side so you can slice it right down the middle to form two rolls.
  5. Repeat the process until you have 12 finished rolls.
  6. Combine wasabi powder with a bit of water to create desired consistency

Don't like sushi, enjoy these with chicken or beef strips and some raw veggies!  Don't be afraid to get creative!

Kate's Healthy Cupboard - Gluten Free Recipes
In Entrees, Recipes, Snacks and Appetizers2 Tags Fish, Low Carb, Nut-Free, Paleo, Raw, Seafood, Sushi
4 Comments

Plantain Flour Tortillas

June 18, 2012 Kate
Plantain Flour Tortillas

Plantain Flour...what the heck is that and where do you find it?  I had no idea there was such a thing until a few months back.  I ordered a bunch and have been experimenting with this starchy, moisture absorbing flour.  After I created the Plantain Tortilla Chips Recipe, I knew I could make some sort of a tortilla as well.  I will probably still try a "corn tortilla" that could be used for an open face taco, but until then, these bendable tortillas are perfect for tacos, burritos, wraps and so much more!!!  I love them warm with melted butter and rolled up.  I think next time I might add some cinnamon too!

There are so many different grain free tortilla recipes out there using almond flour and/or coconut flour.  I just don't think they taste much like a tortilla.  These turned out to be the next best thing to a gluten filled one.  If you have recently been eating "normal" tortillas, these may seem weird, but if you are used to the very different "bread like" products of the gluten free world, you will enjoy these!  They actually bend without breaking and have that doughy taste and feel to them.  I think they are best when served warm and used the same day they are made.  They are fine a day or two later, but like most baked goods, they are best fresh and warm.  I can't wait to try this in an enchilada recipe.

Recipe: Plantain Flour Tortillas
Ingredients
  • 1 tbsp palm shortening, softened
  • 1 tbsp grass-fed butter, melted
  • 2 cups non-dairy milk (I used plain carton coconut milk)
  • 1 cup plantain flour
  • 1 tsp sea salt
  • coconut oil for the skillet
Instructions
  1. Combine all ingredients into a food processor or blender and blend until smooth
  2. Heat a greased skillet (I used a small one) on med-high heat
  3. Once it is hot, pour about 1/4 cup batter onto pan and swirl around to coat it
  4. Cook until brown and flip to cook the other side
  5. I took the pan off the burner and lowered heat between cooking each one. It seems to get too hot and the batter won't swirl around. If you lower the heat, it won't brown the tortilla and make it crispy.

Makes about 10 small tortillas

Plantain Flour is inexpensive compared to nut and coconut flours.  It can be found on Amazon, but is less expensive to order it directly from the company, Barry Farms.  Here is another pancake recipe using Plantain Flour that will make it worth your while to purchase some of it!

Kate's Healthy Cupboard - Gluten Free Recipes
In Breads and Muffins, Entrees, Side Dishes, Recipes, Snacks and Appetizers2 Tags Egg-Free, Nut-Free, Paleo, Plantains, Primal
5 Comments

Salmon with Avocado Sauce

June 7, 2012 Kate
Salmon with Avocado Sauce

Let me first start by saying I can not take credit for this recipe.  I saw a similar recipe for grilled steak with avocado sauce on Pinterest awhile back and it sounded delicious.  I decided to put the sauce over steamed salmon since I love pairing avocado with my salmon.  This would work over any meat or protein of your choice.  I would recommend the rub that is included in the recipe as well.  You can find this recipe from Life's Ambrosia.  I really wasn't trying to copy her photo, I was trying to hide the brown underneath part of the salmon that was visible and gross looking!  That is the fishy tasting part and why most people think salmons too fishy, scrape that off.  I also always ask them to take the skin off at Whole Foods unless I'm grilling the fish. On a side note, let me tell you about the bamboo steaming basket I bought and have fallen in love with!  For $9.99 at Cost Plus, it's a must have in the kitchen.  It's so easy to use and makes fish and meats so moist and tender.  The best part is that is really doesn't smell up the house when steaming salmon.  That has been a huge drawback for me to ever cook fish inside.  All you do is place the basket over a pot of boiling water and let your food cook, easy peasy!  I spray the basket with coconut oil spray, season the fish and let it steam.  I highly recommend getting one of these!!!

Enjoy!

Kate's Healthy Cupboard - Gluten Free Recipes
In Entrees, Recipes Tags Fish, Low Carb, Paleo, Seafood
1 Comment

Roasted Red Pepper & Basil Turkey Burgers

April 26, 2012 Kate
Roasted Red Pepper Turkey Burger

Ground turkey can be tricky to fix for the serious meat eater.  It tends to be a bit boring for them!  I think it may be due to the fact that it can be a drier meat if overcooked and doesn't have a ton of flavor to someone that is used to eating ground red meats.

When purchased from the meat counter, you will almost always get the very lean breast.  Since it is so lean, it tends to dry out very easily.  I personally prefer the taste of the lean over the 85% lean that you can typically find prepackaged.  Either one will work for this recipe or you can go with ground turkey thigh if you prefer.

Recipe: Roasted Red Pepper & Basil Turkey Burger
Ingredients
  • 1 lb ground turkey
  • 1 egg
  • 1 tbsp olive oil
  • 1/4 - 1/2 cup onions, diced
  • 1/3 cup roasted red peppers
  • 3 - 4 garlic cloves, minced
  • 2 tbsp fresh basil, chopped
  • 2 tbsp fresh parsley, chopped
  • 1 tsp sea salt
Instructions
  1. Whisk the egg in a bowl
  2. Add the turkey, onions, oil, peppers, spices and herbs into a bowl and pour the egg into the mixture
  3. Combine all of the ingredients with hands
  4. Form into patties (may seem a bit wet but should stay together)
  5. Heat an oiled skillet over medium heat
  6. Once the skillet is hot, add the patties and cover
  7. Bake for 5-7 minutes. Flip the burgers and bake another 3-4 minutes or until done

Serves: 4

Serve plain, wrapped in lettuce or topped with avocado!

Kate's Healthy Cupboard - Gluten Free Recipes
In Entrees, Recipes Tags Chicken, Low Carb, Nut-Free, Paleo, Turkey
Comment

Spicy Tuna Sashimi Salad

April 16, 2012 Kate
Spicy Tuna Sashimi Salad

This is for all you sushi lovers...or for those that want t give it a try!!  I am a huge fan of sashimi, salmon being my favorite.  Sashimi is thinly sliced, raw seafood.  Many different kinds of fresh fish and seafood are served raw in Japanese Cuisine. It can be served plain or wrapped up in a sushi roll.  I prefer it plain topped with a slice of avocado and wasabi or drizzles with Avocado Vinaigrette.

I had the hardest time years ago trying to force myself to try sushi, let alone sashimi!  It is now a favorite and staple in my diet every week.  I would only eat this at a quality sushi/Japanese restaurant or from Whole Foods.  You can find sushi grade salmon and tuna sashimi in the seafood section of most Whole Foods.  If it is fresh, it does not taste fishy at all!!!  I actually think cooked salmon tastes more fishy than raw.  Be sure to buy it the day you plan to eat it or close to the day.

If you like to use wasabi with your sushi, you can buy it powdered.  It is typically found in the asian section and all you have to do is add a bit of water to the powder.  This recipe doesn't call for it, but it is something I enjoy along side my avocado and sashimi.

If you haven't tried sashimi, now is the time!!!  So easy to digest and full of good fats!  This salad has so much flavor you probably won't even know it's raw fish!!!

Recipe: Spicy Tuna Sashimi Salad

Servings: 2

Ingredients
  • 8 ounces sushi grade tuna, chopped
  • 1 large avocado, chopped
  • 3 tbsp macadamia nuts, chopped
  • 4 green onions, chopped whites and greens
  • 1 1/2-2 tsp hot pepper oil
  • 1 tsp avocado oil (could use lite olive oil or coconut oil or omit)
  • 2-3 tsp Coconut Aminos
  • Sesame seeds
Instructions
  1. Roast the nuts in a dry skillet over high heat until slightly brown, let cool
  2. Combine the tuna, avocado and onions in a bowl
  3. Combine the oils and Coconut Aminos in a bowl, pour over the tuna mixture and stir
  4. Top with a sprinkle of sesame seeds and the nuts

Enjoy this with homemade Taro Chips, on cucumber slices, on Grain Free Wheat Crackers or simply plain!

Visit Allergy Free Wednesday for additional allergy free recipes!

Kate's Healthy Cupboard - Gluten Free Recipes
In Dips and Spreads, Entrees, Side Dishes, Recipes, Snacks and Appetizers2 Tags Fish, Macadamia Nuts, Paleo, Raw, Sushi
3 Comments

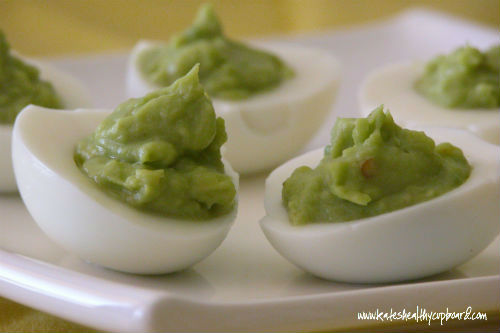
Avocado Deviled Eggs

April 2, 2012 Kate
Avocado Deviled Eggs

Deviled eggs may be something you traditionally serve at your Easter brunch.  How about switching it up a bit with Avocado Deviled Eggs.  Who doesn't like avocado! Eggs are a great source of protein and many other nutrients.  These are really an any time of the year great snack!  They are super easy and fulfilling with the heart healthy fat the avocado provides.  You can doctor up the egg yolk and avocado mixture any way you'd like.

Recipe: Avocado Deviled Eggs
Ingredients
  • 8 eggs, hard boiled and peeled
  • 1 large ripe avocado
  • 2-4 tbsp hot sauce
  • dash of sea salt
  • splash of lime juice
Instructions
  1. Slice the eggs lengthwise and remove the yolks
  2. Rinse the whites to get any leftover yolk out, pat dry
  3. Combine the yolks, avocado, hot sauce, salt and lime juice in a food processor
  4. Pulse until almost smooth
  5. Spoon the mixture into each egg white half
Quick notes

The amount of hot sauce will vary depending on how hot the sauce is. I used 4 tbsp of The Green from Horsetooth Hot Sauce. (local company sold at Whole Foods and Vitamin Cottage or from their website) It is pretty spicy but I love it. It's a mix of green habaneros, serranos, tomatillos, garlic and onion.

I am determined to get hard boiled eggs to come out perfect!  If you could see the eggs in the back of my picture, you'd say my egg skills need work!!!  Every cookbook seems to think they have the answer.  Our altitude makes a bit of a difference but I am going to figure it out!  If anyone knows the trick, please let me know!!!

Kate's Healthy Cupboard - Gluten Free Recipes
In Breakfasts, Dips and Spreads, Entrees, Side Dishes, Recipes, Snacks and Appetizers2 Tags Paleo, Primal
2 Comments
Older Posts →
download.jpeg

Welcome to Kate's Healthy Cupboard! A place for healthy, grain free recipes, some low carb recipes, safe beauty and products for the home  and more...


>>  CONNECT WITH KATE  <<

pinterest.png
facebook.png
instagram.png

>>  SUBSCRIBE  <<

Success! Now check your email to confirm your subscription.

There was an error submitting your subscription. Please try again.


>>  SEARCH RECIPES  <<


Copyright 2016 Kate's Healthy Cupboard  ||  Website Design